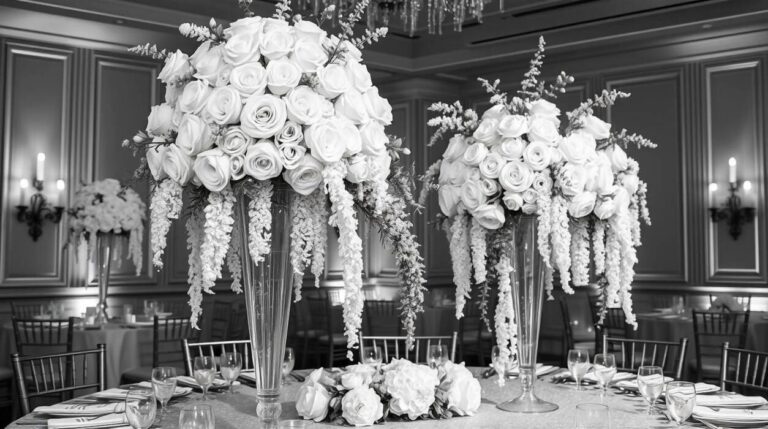
Best Diy Decorating Glass Vases in 2026
The art of diy decorating glass vases is all about transforming simple, transparent vessels into personalized decor pieces. Using accessible materials like paint, twine, glitter, or fabric, you can easily create custom accents that match your unique style.
This creative process gives new life to basic glassware, turning it into a stunning centerpiece, a thoughtful gift, or a beautiful home for your favorite flowers.
In our experience, the most successful projects begin with a thoroughly cleaned surface. We recommend wiping the glass with rubbing alcohol to remove any fingerprints or residue that could prevent paint from sticking.
We’ve found that having a clear design in mind before you start—whether it’s a simple stripe or a complex texture—helps ensure the final result looks polished and intentional from the very beginning.
Most tutorials focus on decorating the exterior, but a fantastic trick is to paint the inside of the vase. Pour a small amount of acrylic paint into the vase and gently swirl it around to coat the interior surface evenly.
This creates a flawless, high-gloss block of color when viewed from the outside and, once cured, protects the finish from any external scuffs or scratches.
A common mistake is thinking you need expensive, specialty glass paints. The truth is, standard acrylic craft paint works wonderfully for diy decorating glass vases if you mix in a glass medium first. This additive helps the paint adhere permanently to the non-porous surface, making it more durable.
Without it, your beautiful design could easily scratch off or wash away with water.
Ready to turn your plain vases into statement pieces? We’ve compiled our favorite techniques, from simple painting methods to more advanced textural effects. This guide breaks down everything you need to know to get started, ensuring your next DIY project is a beautiful success. Let’s begin creating something you’ll be proud to display.
In This Guide
The Complete Guide to Diy Decorating Glass Vases
Transforming a simple glass vase from a clear, functional object into a bespoke piece of art is one of the most rewarding DIY projects. It requires minimal investment but offers maximum creative impact. Whether you’re upcycling an old flower vase or starting with a new one from the craft store, the possibilities are endless.
We find that the non-porous surface of glass is a perfect canvas for a variety of techniques, from simple painting to more intricate etching.
This guide is designed to empower you with the knowledge and confidence to tackle any glass vase project. We’ll explore different methods, materials, and the critical preparation steps that ensure a professional-looking finish. Forget generic store-bought decor; creating your own allows for perfectly matched color palettes and personal style.
In our experience, even a basic $5 cylindrical vase can become a stunning centerpiece that looks far more expensive than it is.
From choosing the right type of paint to mastering the art of decoupage, we’ve broken down everything you need to know. You will learn how to properly prep your glass for long-lasting adhesion and how to seal your work for durability. We suggest starting with a simple project, like a single-color spray paint job, to build your skills.
Soon you’ll be creating intricate patterns and textured designs with ease, turning every clear vase into a unique statement.
Everything You Need to Know Before Starting
Before you even think about picking up a paintbrush, proper preparation of the glass surface is absolutely critical. Any residue, from fingerprints to dust, can prevent paint or adhesive from bonding correctly. We recommend a thorough wash with hot, soapy water, followed by a final wipe-down with isopropyl alcohol on a lint-free cloth.
This final step removes any remaining oils and ensures your design will be durable and peel-resistant for years to come.
The shape of your vase significantly influences the best decorating technique. A simple, cylindrical vase is ideal for beginners and works well for wrapped designs, stencils, or full-coverage paint.
In contrast, a vase with complex curves or an embossed pattern can be more challenging to paint evenly but is perfect for techniques like highlighting existing details with a metallic paint pen or applying a sea glass spray that embraces imperfections. Consider the final look you want to achieve before selecting your vase.
Choosing the right materials is just as important as the preparation. For an opaque, matte, or glossy finish, a good quality multi-surface acrylic craft paint is excellent. If you want a translucent, stained-glass effect, you’ll need to use paints specifically formulated for glass.
We also suggest having painter’s tape on hand for creating sharp lines and a clear acrylic sealer spray to protect your finished masterpiece from chipping and moisture.
Step-by-Step Breakdown
| Technique | Difficulty Level | Best For | Key Supplies |
|---|---|---|---|
| Interior Painting | Easy | Creating a bold, single-color look with a flawless exterior finish. | Multi-surface acrylic paint, squeeze bottle for pouring. |
| Glass Etching | Intermediate | Adding elegant, permanent frosted designs like monograms or patterns. | Etching cream (e.g., Armour Etch), adhesive stencils, protective gloves. |
| Decoupage | Intermediate | Applying intricate patterns using paper napkins or specialty tissue. | Mod Podge (Gloss or Matte), decorative paper, small paintbrush. |
| Textured Spray Paint | Easy | Achieving unique finishes like stone, sea glass, or frosted effects. | Specialty spray paint (e.g., Krylon Sea Glass), painter’s tape, drop cloth. |
Regardless of the method you choose, setting up a dedicated workspace is the first practical step. We suggest laying down a plastic drop cloth or old newspaper to protect your surfaces from paint drips or etching cream. Proper ventilation is also non-negotiable, especially when working with spray paints or chemical etchants.
Opening a window or setting up a small fan ensures a safe environment and helps your project dry more effectively without trapping fumes.
Once your design is complete, sealing it is the key to longevity. For decorative vases that won’t see much water, a simple spray of clear acrylic sealer in a gloss or matte finish works perfectly. If you’ve painted a vase that might be hand-washed, we recommend using a brush-on, water-based varnish or a dishwasher-safe sealant like Mod Podge Dishwasher Safe.
This extra step provides a durable barrier against moisture and minor scratches.
Patience during the curing process is a virtue that pays off. Most acrylic paints feel dry to the touch within an hour, but they haven’t fully cured. For maximum durability, we find it’s best to let the vase sit undisturbed for at least 24 to 72 hours.
Some specialty glass paints require oven-curing to become permanent and washable; always read the manufacturer’s instructions on the product label for the best results and a truly lasting finish.
Common Mistakes People Make with Diy Decorating Glass Vases
One of the most frequent missteps we see is skipping the preparation phase. Glass looks clean, but it’s often covered in fingerprints, dust, or a thin film of manufacturing residue. Painting or gluing directly onto an unprepared surface is a recipe for failure, as your materials won’t adhere properly.
We always start by thoroughly cleaning the vase with soap and water, followed by a final wipe-down with isopropyl alcohol to ensure a pristine, oil-free canvas.
Choosing the wrong type of paint is another classic blunder. Standard craft acrylics might look good initially, but they will easily scratch, peel, or wash right off a non-porous glass surface. For a project that lasts, you must use paints formulated for glass. We recommend using enamel acrylics or multi-surface paints that explicitly state they are suitable for glassware.
This ensures a proper bond and a much more durable, professional-looking finish that won’t disappoint.
A beautifully painted vase can be ruined by neglecting the final sealing step. Without a protective top coat, your design is vulnerable to chipping, scuffs, and water damage, especially if it’s in a high-traffic area or will be handled frequently. We suggest applying a clear, waterproof sealant spray after the paint has fully cured.
For ultimate durability, many glass paints can be heat-cured in a home oven, which makes the design remarkably permanent and often dishwasher-safe.
Pro Tips That Make a Real Difference
For incredibly crisp, clean lines in your designs, the secret lies in your taping technique. Instead of standard masking tape, we suggest using a quality painter’s tape for straight lines or flexible vinyl tape for curves. To prevent any paint from bleeding underneath, apply a thin coat of clear medium or even your base color along the tape’s edge first.
This seals the edge, so when you apply your main color, you get a perfectly sharp line every time.
Don’t limit yourself to just a paintbrush; texture can elevate a simple glass vase into a piece of art. We’ve found that using a natural sea sponge is perfect for creating a marbled or stone-like effect. For a more abstract, crinkled texture, try dabbing paint on with a crumpled piece of plastic wrap.
Layering different shades with these methods adds a professional depth and complexity that a flat coat of paint simply cannot achieve.
When using paints that are heat-settable, following the curing process is a non-negotiable step for longevity. This is what transforms a craft project into a durable piece of decor.
The standard method we follow is to place the completely dry vase into a cool oven, heat it to the temperature on the paint label (usually around 350°F), bake for 30 minutes, and then turn the oven off, letting the vase cool down completely inside. This process makes the paint incredibly scratch-resistant.
Frequently Asked Questions About Diy Decorating Glass Vases
The best paint truly depends on the final look you’re after. For a vibrant, translucent stained-glass effect, we recommend using alcohol inks or a product like Pebeo Vitrea 160. If you want a bold, opaque finish, your best bet is a multi-surface acrylic paint or a specialized enamel craft paint.
The most important factor is to ensure the product description explicitly says it’s formulated for glass or non-porous surfaces for proper adhesion and durability.
To make your decorated vase waterproof, especially for holding fresh flowers, a two-part approach is best. First, use a paint designed for glass that is inherently water-resistant. After the paint has fully cured (we suggest waiting at least 24 hours), apply several thin coats of a clear, waterproof sealant.
We have found that a spray-on polyurethane or acrylic sealer provides an even, protective finish that guards against moisture and chipping, preserving your hard work.
While you can decorate the inside, we generally advise against it if the vase will hold water. Most craft paints aren’t made for constant submersion and can peel or flake over time, creating a mess and potentially harming your flowers. A great alternative is the “pour painting” technique.
You can pour paint inside, swirl to coat the glass, then pour out the excess and let it dry thoroughly for weeks. This gives you interior color without the water-damage risk.
Frequently Asked Questions
What kind of paint works best on a glass vase?
For most projects, we recommend using acrylic craft paint specifically formulated for glass or multi-surface use. These paints adhere well and are easy to work with. For a flawless, even finish, spray paint designed for glass is an excellent choice, though it requires good ventilation.
If you’re creating intricate patterns or lettering, we’ve found that oil-based paint pens offer superior control and opacity. Always check the label to ensure the product is suitable for non-porous surfaces.
How do I get paint to stick to glass permanently?
The key to permanent adhesion is proper prep and curing. We always begin by cleaning the vase with rubbing alcohol to remove any grease or fingerprints that could prevent the paint from sticking. After painting, you must let it cure.
Depending on the paint, this may involve baking the vase in your oven (follow the paint’s instructions carefully) or letting it air-dry for up to 21 days. This step is crucial for a durable, scratch-resistant finish.
Can you wash a painted glass vase?
Yes, but you must be gentle. Once the paint is fully cured, your vase should be fairly durable. However, we strongly advise against putting it in a dishwasher, as the high heat and harsh detergents can damage the design. We recommend only gentle hand-washing on the exterior with cool water and mild soap.
Do not use abrasive sponges on the painted surface. The inside can be cleaned normally with a bottle brush.
How can I fix a mistake or remove old paint?
If you make a mistake with wet acrylic paint, it can often be wiped away with a damp paper towel. For dried paint, we’ve found that scraping it carefully with a razor blade scraper is very effective.
If the paint is stubborn, you can apply a small amount of acetone or nail polish remover to a cotton ball and rub the spot to dissolve the paint, then wipe the glass clean before starting again.
What can I use to decorate a vase besides paint?
There are so many creative options beyond paint! We love wrapping vases in materials like jute twine or colorful yarn for a rustic, textured look. You can also use decoupage techniques with decorative paper napkins and Mod Podge for a unique pattern.
For a more elegant feel, consider applying metallic gold leaf or using a frosted glass spray to create a beautiful etched effect. Even simple bands of washi tape can add a pop of color.
Final Thoughts
Transforming a simple glass vase is a wonderfully rewarding and accessible DIY project. As we’ve explored, you don’t need to be a professional artist to achieve stunning results. With just a few basic supplies like paint, twine, or decoupage materials, you can turn a forgotten item into a personalized centerpiece that perfectly matches your home’s decor.
It’s a fantastic way to upcycle items you already own and add a unique, handmade touch to any room.
The best way to start is to simply begin. Grab that old vase from the back of the cabinet, pick a technique that excites you, and don’t be afraid to experiment. In our experience, some of the most beautiful creations come from happy accidents.
We encourage you to embrace the process, have fun with it, and enjoy the deep satisfaction of making something beautiful with your own hands.

Chloe Bennett is an interior stylist and ceramic enthusiast with a passion for curation. She specializes in finding the perfect vases to elevate home spaces, blending contemporary design with vintage aesthetics. Her expert guides help readers select, style, and care for unique vessels that transform ordinary rooms into art.