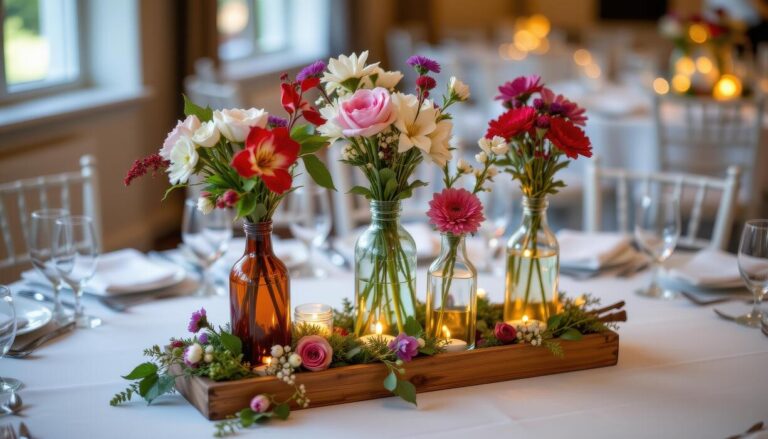
Best Diy Glass Vase Decoration Ideas in 2026
The best diy glass vase decoration ideas involve simple techniques like painting, wrapping, or filling to transform a plain container into a custom decor piece. You can easily update a vase by applying acrylic paint, winding twine or ribbon around it, or filling it with decorative elements like sand, pebbles, or fairy lights.
These methods are budget-friendly and perfect for personalizing your space.
In our experience, the most impactful projects don’t have to be complicated. We found that focusing on texture is a great starting point. For example, applying a coat of textured spray paint can instantly give a cheap glass vase a high-end, ceramic look.
We also recommend grouping several decorated vases of different heights together to create a more dynamic and visually interesting display.
Here’s an insight many guides overlook: use painter’s tape for more than just straight lines. By tearing the tape, you can create beautifully rustic, deckled edges for a two-toned effect. This trick gives you a soft, organic transition between colors or textures, avoiding the harsh, geometric lines that can sometimes make DIY projects look too rigid and homemade.
It’s a simple way to add artistic flair.
A common mistake with diy glass vase decoration ideas is not properly preparing the glass surface. Many people skip cleaning the vase with rubbing alcohol, causing paint or glue to peel or chip away easily.
Taking just one minute to wipe down the glass ensures that your design will adhere correctly and last for years, rather than failing after a few weeks.
Now that you have the foundational tips, you’re ready to get creative. We’ve broken down our favorite projects into simple, actionable steps. This guide will walk you through everything from choosing the right materials to executing the design flawlessly, ensuring you create a piece you’ll be proud to display.
In This Guide
The Complete Guide to Diy Glass Vase Decoration Ideas
Transforming a simple glass vase from a plain vessel into a stunning piece of home decor is easier than you might think. A clear vase is a blank canvas, offering endless possibilities for creativity. In our experience, these projects aren’t just about holding flowers; they’re about creating custom accents that reflect your personal style.
From minimalist chic to rustic charm, we’ve found that a few simple techniques can elevate a $5 thrift store find into a priceless-looking centerpiece.
The core techniques for decorating glass vases fall into a few main categories: painting, wrapping, filling, and etching. For a vibrant pop of color, multi-surface acrylic paints are our go-to. If you prefer texture, wrapping a vase in jute twine or thick yarn adds a cozy, rustic feel.
Filling a vase with materials like sea glass, river stones, or even fairy lights can create a dynamic display. The key is to choose a method that complements the vase’s shape.
Before you dive in, consider the aesthetic of the room where the vase will live. A sleek, modern space might call for a vase with clean, painted geometric lines, while a bohemian sunroom would be the perfect home for a decoupaged piece with floral tissue paper. We suggest gathering inspiration from your existing decor.
A well-executed DIY vase shouldn’t just stand out; it should effortlessly integrate with its surroundings, making the entire space feel more cohesive and personalized.
Everything You Need to Know Before Starting
Proper preparation is the secret to a professional-looking finish. Before you even think about paint or glue, your glass vase must be impeccably clean. We recommend washing it with hot, soapy water and then wiping the entire surface down with isopropyl alcohol on a lint-free cloth.
This crucial step removes fingerprints, dust, and oily residues that can prevent paint and adhesives from bonding properly. A pristine surface is absolutely non-negotiable for achieving a flawless result.
Choosing the right materials is paramount. For painted projects, we suggest using paints specifically formulated for glass, like FolkArt Enamels, or a high-quality multi-surface craft paint. When wrapping, consider the final texture; coarse jute twine offers a rustic feel, while smooth satin ribbon creates a more elegant look.
Don’t forget your adhesives—a hot glue gun works well for chunky materials, whereas a clear-drying craft glue like E6000 is better for delicate applications that require a strong, invisible bond.
Always set up your workspace for success and safety. We advise laying down a drop cloth or old newspaper to protect your table from spills and drips. If you’re working with spray paints, adhesives, or sealants, ensure your space is well-ventilated by opening a window or working outdoors.
Having all your tools—brushes, painter’s tape, scissors, and cleaners—organized and within reach before you start prevents frustrating interruptions and helps keep the creative process smooth and enjoyable.
Step-by-Step Breakdown
| Technique | Difficulty Level | Key Materials | Best For |
|---|---|---|---|
| Painted Designs | Easy to Medium | Multi-surface acrylic paint, painter’s tape, brushes, sealant | Creating colorful, modern, or geometric patterns. |
| Twine/Rope Wrapping | Easy | Jute twine or rope, hot glue gun, scissors | Achieving a rustic, coastal, or farmhouse aesthetic. |
| Faux Sea Glass Finish | Medium | Frosted glass spray paint, food coloring (optional), Mod Podge | Mimicking the soft, matte look of beach-tumbled glass. |
| Decoupage | Medium | Decorative tissue paper/napkins, Mod Podge, foam brush | Adding intricate patterns, images, or a vintage floral vibe. |
This table provides a quick overview to help you select a project that matches your skill level and desired style. The difficulty ratings are a general guide; an “easy” project like twine wrapping can be mastered by a complete beginner, while a “medium” technique like creating a faux sea glass finish may require a bit more patience to perfect.
We find that starting with a simple project can build confidence for tackling more complex designs later on. Don’t be afraid to experiment!
Let’s take a closer look at painted designs. For crisp, professional-looking lines, painter’s tape is your best friend. You can create stripes, chevrons, or complex geometric patterns simply by masking off sections of the glass before you paint. For a more organic, textured look, try dabbing paint on with a sea sponge instead of a brush.
We suggest applying two thin coats of paint rather than one thick coat to prevent drips and achieve even coverage.
No matter which technique you choose, sealing your work is a critical final step. For painted or decoupaged vases that might be exposed to moisture, we strongly recommend applying a protective top coat. A brush-on sealant like Mod Podge Dishwasher Safe Gloss or a clear acrylic spray sealant will protect your design from chipping, fading, and water damage.
This simple action ensures your beautifully decorated vase remains a cherished part of your decor for years to come.
Common Mistakes People Make with Diy Glass Vase Decoration Ideas
One of the most frequent errors we see is skipping proper preparation. Fingerprints, dust, and oils on the glass surface are invisible enemies to your project. They prevent paint and adhesives from bonding correctly, leading to peeling, chipping, or a bubbly finish.
Before you start any project, we strongly advise cleaning the entire vase thoroughly with rubbing alcohol and a lint-free cloth. This simple step is non-negotiable for a professional-looking result.
Another common pitfall is over-decorating. In the excitement of a new project, it’s easy to add too many colors, textures, and elements. This often results in a cluttered, chaotic design rather than a chic statement piece. Our experience shows that a more focused approach works best.
Try sticking to a limited color palette of 2-3 complementary shades or one primary decorative technique, like painting or wrapping, but not both in a complex way.
Using the wrong materials can quickly turn a fun DIY into a frustrating mess. For instance, using standard craft acrylics on a vase intended for fresh flowers will result in the paint washing away. We suggest using multi-surface enamel paints for durability. Similarly, visible, clumpy hot glue can ruin an otherwise elegant design.
Opt for a strong, clear adhesive like E6000 for a cleaner, more secure bond on non-porous surfaces.
Pro Tips That Make a Real Difference
To truly elevate your vase, think about layering textures. Combining the smooth, cool surface of glass with contrasting materials creates incredible visual and tactile interest. We recommend wrapping the bottom third of a vase with rough jute twine and then painting the top portion with a sleek metallic spray paint.
This juxtaposition of rustic and modern elements can transform a simple dollar-store vase into what looks like a high-end-boutique find.
For painted designs, applying a final top coat is the secret to longevity. After your paint has fully cured, we suggest using a clear spray sealant in a matte or gloss finish. This not only protects your hard work from scratches and moisture but also unifies the surface, giving it a polished, finished appearance.
This single step can dramatically increase the durability and professional quality of your decorated vase, ensuring it lasts for years.
Achieving perfectly crisp lines for geometric patterns or color-blocking is easier than you think. The key is using a high-quality painter’s tape, such as FrogTape, which has a paint-blocking technology. For an absolutely flawless edge, press the tape down firmly with a fingernail or a credit card to seal it.
We found that removing the tape when the final coat of paint is still slightly damp gives you the sharpest line possible without peeling any paint.
Frequently Asked Questions About Diy Glass Vase Decoration Ideas
What is the best type of paint to use on a glass vase? For a durable and opaque finish, we recommend multi-surface acrylic enamels, which can be cured for water resistance. If you’re aiming for a translucent, stained-glass effect, specific glass paints like Gallery Glass are the way to go.
For a frosted or sea-glass look, there are specialty spray paints designed for that exact purpose. No matter which you choose, always start with a clean, alcohol-prepped surface.
How can I decorate a vase without using any paint? There are so many creative no-paint options! We love the textural effect of wrapping a vase tightly with materials like jute rope, thick yarn, or strips of fabric. You can also use decoupage techniques with decorative napkins and Mod Podge to apply intricate patterns.
Another simple yet elegant idea is to fill the vase with layers of colored sand, small river stones, fairy lights, or even coffee beans.
How do I make my painted vase waterproof for real flowers? This is essential for functionality. The secret lies in two things: the right paint and proper curing. Start with a paint designed for glass, like an acrylic enamel. After painting, you must let it cure.
While some paints air-cure to a water-resistant state over 21 days, we suggest oven-curing for a faster and more durable result. Always follow the paint’s specific instructions, which usually involve baking at a low temperature.
Frequently Asked Questions
How do you paint a glass vase permanently?
For a durable, long-lasting finish, we recommend using paints specifically designed for glass. Your best options are enamel craft paint or multi-surface acrylic paint. After applying your design, proper curing is essential. This usually involves either baking the vase in an oven according to the paint manufacturer’s instructions or letting it air-cure for several weeks.
This process ensures the paint bonds securely to the non-porous glass surface, making it resistant to chipping.
What can I put in a clear glass vase besides flowers?
Clear vases are wonderfully versatile for more than just floral arrangements. We love using them to create seasonal or ambient displays. Consider filling a vase with fairy lights for a magical glow, or use layers of colored sand, small pebbles, or sea glass for a coastal theme.
Other popular decorative fillers include wine corks, polished river stones, faux fruit like lemons or limes, or even colorful buttons for a whimsical touch.
How do you decorate a glass vase without painting it?
There are many fantastic no-paint options! One of our favorite techniques is twine wrapping, where you use a hot glue gun to secure jute or colorful yarn around the vase for a rustic look. You can also wrap the vase in beautiful fabric scraps, lace, or ribbon.
For a more modern and less permanent design, applying pre-made vinyl decals or using washi tape allows for endless creativity and easy changes.
Can you use Mod Podge on a glass vase?
Absolutely! Mod Podge is an excellent tool for decorating glass vases. It’s most commonly used for decoupage, which is the art of applying paper cutouts from napkins, tissue paper, or magazines to the surface.
You can also mix it with food coloring to create a translucent, sea-glass effect or use its different finishes like matte or glossy to seal painted designs or add texture to the entire vase.
How do you get paint to stick to glass?
The key to ensuring paint adheres well to a slick glass surface is proper preparation. Before you begin, it’s crucial to clean the vase thoroughly. We’ve found the most effective method is to wipe the entire surface with rubbing alcohol on a lint-free cloth. This removes all oils, fingerprints, and residue that could prevent the paint from bonding.
Letting the glass dry completely before painting is an equally important final step.
Final Thoughts
We’ve seen how a simple glass vase can be a blank canvas for boundless creativity. From the transformative power of paint and Mod Podge to the rustic charm of twine and the simple elegance of decorative fillers, there are techniques to suit every style and skill level.
In our experience, these DIY projects are not just about decorating; they’re about infusing your personality into your home decor and making everyday objects beautiful and meaningful.
Now it’s your turn to get creative. We encourage you to pick one idea that sparked your interest and just give it a try. Don’t worry about perfection; the goal is to have fun and make something you love. Grab that unused vase from the cupboard and begin your small project today.
The most rewarding part is seeing your unique vision come to life.

Chloe Bennett is an interior stylist and ceramic enthusiast with a passion for curation. She specializes in finding the perfect vases to elevate home spaces, blending contemporary design with vintage aesthetics. Her expert guides help readers select, style, and care for unique vessels that transform ordinary rooms into art.