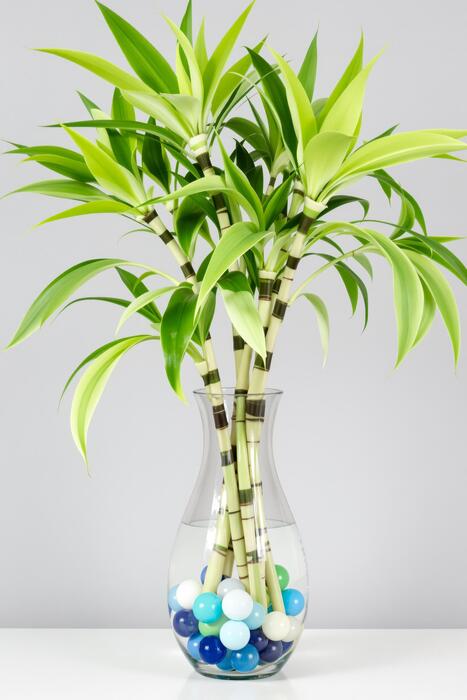
Best Diy Ideas For Glass Vases in 2026
Finding great diy ideas for glass vases is all about reimagining a simple object. You can transform them by painting with acrylics, wrapping them in twine or fabric, or filling them with decorative elements like sand or pebbles.
These projects let you create custom decor that perfectly matches your style, turning a basic vase into a unique statement piece for your home.
In our experience, the most successful projects start with a clear vision. We recommend gathering your materials—like spray paint, decoupage glue, or even sea glass—before you begin. We’ve found that even a simple dollar-store vase can become a high-end-looking accent piece with just a little creativity. It’s about seeing the potential in the plain glass and bringing it to life.
Here’s a tip most guides overlook: proper surface preparation is non-negotiable. Before you start any project, thoroughly wash your vase and then wipe it down with rubbing alcohol. This simple step removes any oils or residues that prevent paint and adhesives from bonding properly. It’s the secret to a professional, long-lasting finish that won’t chip or peel over time.
The most common mistake we see with diy ideas for glass vases is skipping the sealant. Many people create a beautiful design only to have it scratch or wash off later. Applying a clear acrylic sealer or a top coat of Mod Podge is crucial, especially if you plan to use the vase for fresh flowers.
It protects your hard work from damage.
Ready to turn those plain glass vases into something special? We’ve gathered our favorite techniques, from simple five-minute upgrades to more involved artistic projects. This guide will walk you through everything you need to know to get started on your next creative adventure. Let’s make something beautiful together.
In This Guide
The Complete Guide to Diy Ideas For Glass Vases
The humble glass vase is one of the most versatile decor items you can own, and its transformative potential is nearly limitless. In our experience, a simple cylinder, bud, or hurricane vase is a blank canvas awaiting your creative touch.
DIY projects allow you to elevate these basic pieces into custom decor that perfectly matches your style, whether you prefer a rustic farmhouse look, a sleek modern aesthetic, or a vibrant bohemian vibe. It’s all about seeing the possibility within the glass.
We’ve explored countless techniques, from simple to complex, to breathe new life into glassware. You can achieve stunning results with acrylic paint, creating color-blocked patterns or a fully opaque finish. Wrapping vases in materials like jute twine, rope, or even leather strips adds incredible texture.
For a more subtle and elegant effect, we suggest trying etching cream or frosted glass spray paint to create sophisticated patterns or a soft, diffused look that is truly timeless.
Beyond simply beautifying your own space, these DIY vase projects make for fantastic personalized gifts and stunning event centerpieces. Imagine a set of hand-painted vases for a wedding reception or a custom-etched piece for a housewarming present.
The best part is that most of these ideas are incredibly accessible and budget-friendly, requiring minimal supplies and catering to all skill levels, from the novice crafter to the seasoned DIY expert. It’s a satisfying way to create something beautiful.
Everything You Need to Know Before Starting
Before you even think about picking up a paintbrush, proper preparation of your glass vase is paramount. We cannot stress this enough: the glass surface must be impeccably clean. We recommend a thorough wash with soap and water, followed by a final wipe-down with isopropyl alcohol on a lint-free cloth.
This step removes any lingering oils or residue from your fingers, ensuring that paint and adhesives will bond properly. Skipping this step is the number one cause of peeling paint.
Choosing the right materials is crucial for a project’s success and longevity. For painted designs, we suggest using a high-quality multi-surface acrylic craft paint or a paint specifically formulated for glass. If your vase will hold water, you must apply a waterproof sealant. When wrapping with twine or fabric, a high-temp hot glue gun provides the strongest, most immediate bond.
Thinking about the vase’s final function beforehand will guide your material choices effectively.
Always prioritize safety and a well-organized workspace. If you’re working with spray paints, sealants like polyurethane spray, or etching cream, ensure your area is extremely well-ventilated—outdoors is often best. We suggest laying down a drop cloth or several layers of newspaper to protect your surfaces from spills and overspray.
Having all your tools—tape, brushes, scissors, and stencils—laid out and accessible makes the creative process flow so much more smoothly and prevents frustrating interruptions.
Step-by-Step Breakdown
| Technique | Difficulty Level | Key Supplies | Best For |
|---|---|---|---|
| Paint Dipped / Color Block | Beginner | Multi-surface acrylic paint, painter’s tape, disposable container | Creating a modern, minimalist look with clean lines and bold color. |
| Twine Wrapped | Beginner | Jute or cotton twine, high-temp hot glue gun, scissors | Adding rustic, coastal, or bohemian texture to a plain vase. |
| Frosted / Etched Glass | Intermediate | Frosted glass spray paint or etching cream, stencils, gloves | Achieving an elegant, high-end look or creating subtle, custom patterns. |
For the paint-dipped method, achieving that perfectly crisp line is the goal. We find that using a quality painter’s tape is essential for preventing bleeds. After taping your line, pour your paint into a container slightly wider than the vase. Dip the vase slowly, rotate to coat, and then lift it straight up, allowing excess to drip off.
The key is to remove the painter’s tape while the paint is still slightly wet for the cleanest edge possible.
When starting a twine-wrapped vase, securing the first row is everything. We recommend applying a solid line of hot glue around the base and pressing the end of the twine firmly into it. As you wrap, apply small dots of glue every few rows to keep it secure.
The secret to a professional look is to keep the twine pulled taut and push each new row snugly against the last, leaving no glass visible between the strands.
You can achieve a beautiful frosted look without the hazards of traditional etching cream. We often turn to frosted glass spray paint for its ease of use and consistent results. The trick is to apply several very light coats rather than one thick one. Hold the can about 10-12 inches from the vase and spray in a steady, sweeping motion.
This layering technique prevents drips and creates a far more even, believably frosted finish that looks professionally done.
Common Mistakes People Make with Diy Ideas For Glass Vases
One of the most frequent errors we see is improper surface preparation. Simply wiping a vase down isn’t enough. Fingerprint oils, dust, and sticker residue can create a barrier that prevents paint and adhesives from bonding correctly. This often results in peeling paint or decorations that fall off easily.
A pristine surface is the foundation of a successful project, so skipping this step is a recipe for disappointment and a less-than-professional finish.
Using the wrong type of paint is another major pitfall. Many crafters grab standard acrylic craft paint, which doesn’t adhere well to a non-porous surface like glass and can easily scratch off. If the vase will hold water, using a non-waterproof paint will lead to a smudged, bubbling mess.
We always recommend using a paint specifically formulated for glass, like acrylic enamel, which cures to a much harder, more durable finish.
A lack of patience often undermines an otherwise great project. Rushing the drying process is a classic mistake. Paint might feel dry to the touch in an hour, but it hasn’t fully cured. Handling the vase too soon can lead to smudges, fingerprints, and peeling. Many enamel paints require a full cure time of 21 days to achieve maximum durability.
Giving your project adequate time to cure is non-negotiable for a lasting design.
Pro Tips That Make a Real Difference
For a flawless start, always clean your glass vase with isopropyl alcohol on a lint-free cloth. This step goes beyond simple washing by removing all invisible oils and residues that can repel paint. In our experience, this single action dramatically improves paint adhesion and is the number one secret to achieving a professional, long-lasting finish.
It’s a quick step that makes a huge impact on the final quality of your work.
To avoid unsightly brush strokes, we suggest using a foam pouncer or a sponge for applying paint. Dabbing the paint on in thin, even layers builds up color beautifully without leaving lines. For an even smoother finish, a quality spray paint like Krylon Fusion for Glass is an excellent choice.
Remember, applying two or three thin coats is always superior to one thick, drippy coat. Patience during application pays off every time.
Sealing your finished piece is a step many people skip, but it’s crucial for durability. We recommend applying a clear, non-yellowing sealant once your paint has fully cured. A spray acrylic or polyurethane sealer provides a tough, protective barrier against scratches, chipping, and moisture. This is especially important if the vase will be handled frequently or used for fresh flowers.
This final coat is your project’s best defense against wear and tear.
Frequently Asked Questions About Diy Ideas For Glass Vases
The best paint to use depends on the desired finish. For an opaque, durable look, we recommend multi-surface acrylics or acrylic enamel paints like FolkArt Enamels, which are designed to adhere strongly to glass. Some even become dishwasher-safe after heat curing in your home oven. For a translucent, sea-glass effect, specific glass paints or alcohol inks are fantastic options.
Always read the label to see if the paint meets your project’s needs.
To make a painted vase waterproof, the best strategy is to paint only the outside surface. Start with a waterproof paint designed for glass. After the paint has completely cured—which can take up to 21-28 days for some enamel types—we suggest applying two coats of a clear, waterproof sealant.
A spray-on marine varnish or a brush-on polyurethane will create a robust, water-resistant barrier, protecting your design from splashes and cleaning.
If you make a mistake, removing paint is possible. For wet water-based paint, a damp cloth works immediately. For dried acrylic, soaking the area in hot, soapy water can soften it enough to be scrubbed off. For stubborn, fully cured paint, a more aggressive approach is needed.
We find that carefully using a razor blade scraper at a low angle or applying a solvent like acetone (nail polish remover) will effectively strip the paint for a fresh start.
Frequently Asked Questions
How do you paint a glass vase permanently?
For a lasting finish, first clean the vase with rubbing alcohol. We recommend using acrylic enamel paint or a multi-surface craft paint specifically designed for glass. The key to permanence is curing the paint. You can either let it air-dry for about 21 days or bake the vase in the oven according to the paint manufacturer’s specific instructions.
This process makes the design much more durable and often top-rack dishwasher-safe.
What can I put in a tall glass vase besides flowers?
Tall vases offer a fantastic canvas for non-floral arrangements. We love filling them with natural elements like birch branches, bamboo stalks, or dried pampas grass for a modern, textured look. For a coastal theme, try layering sand and seashells.
You can also create a stunning centerpiece by filling a vase with fairy lights, floating candles in water, a collection of wine corks, or colorful decorative orbs for a simple yet elegant display.
How do you get the white film out of a glass vase?
That stubborn white film is usually a mineral deposit from hard water. In our experience, a simple, effective solution is a paste of baking soda and white vinegar. Apply the paste to the inside of the vase and scrub thoroughly with a bottle brush.
For very tough stains, let pure white vinegar sit in the vase for several hours before scrubbing. A final rinse with warm, soapy water will leave it sparkling.
How can I decorate a plain glass vase without paint?
There are many creative options beyond paint. We suggest wrapping the vase with different textures like jute twine, burlap ribbon, or delicate lace for a rustic or shabby-chic feel. You can also use decoupage techniques with decorative napkins and Mod Podge. For a modern look, try applying metallic gold or copper tape in geometric patterns.
Using etching cream with a stencil is another great way to create a permanent, frosted design.
How do you stop a top-heavy flower arrangement from tipping a vase over?
To improve stability, the best method is to add weight to the bottom of the vase before adding water or flowers. We recommend filling the base with a layer of decorative stones, clear glass beads, or marbles. This not only anchors the vase effectively but also adds a beautiful visual element that hides the flower stems.
For extra security on a slick surface, you can use a small amount of museum putty on the bottom rim.
Final Thoughts
Transforming a simple glass vase is a wonderfully creative and accessible DIY project. As we’ve explored, you don’t need expensive supplies or years of experience to make something beautiful. From a simple coat of paint to wrapping it in twine, these ideas allow you to customize your decor to perfectly match your personal style.
We hope these projects have shown you the hidden potential sitting in that clear glass vessel on your shelf.
Your next step is simple: pick one idea that sparked your interest and just give it a try. Don’t worry about perfection; the true beauty of DIY is in the creative process and the personal touch you add. So grab that old vase from the cupboard, gather a few basic supplies, and let your imagination flow.
We are confident you’ll create something you’re proud to display.

Chloe Bennett is an interior stylist and ceramic enthusiast with a passion for curation. She specializes in finding the perfect vases to elevate home spaces, blending contemporary design with vintage aesthetics. Her expert guides help readers select, style, and care for unique vessels that transform ordinary rooms into art.