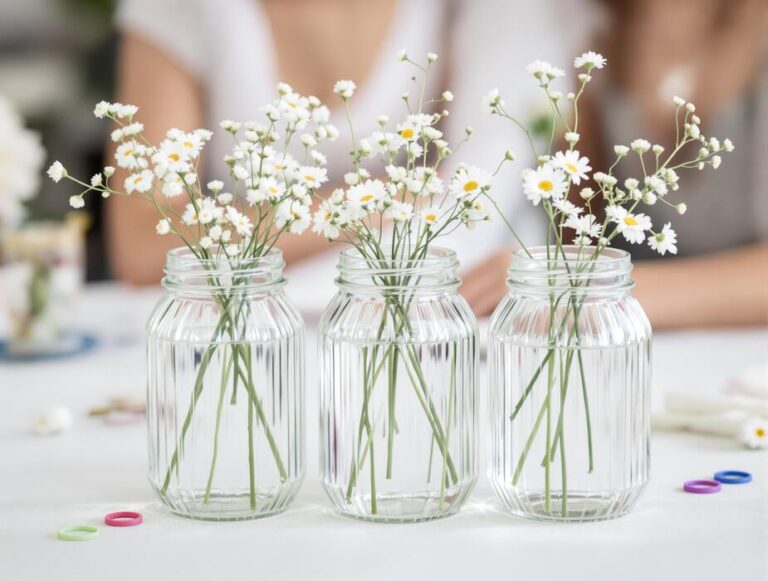
Best Diy Glass Vase Ideas in 2026
DIY glass vase ideas involve transforming ordinary glass containers—like jars, bottles, or basic vases—into unique decorative pieces. This can be done using simple materials such as paint, fabric, twine, or even natural elements.
These diy glass vase ideas are an accessible and creative way to upcycle items you already own, adding a personal touch to your home decor without a high cost.
In our experience, the best projects start with a clean, dry surface and a clear vision. We’ve found that techniques like acrylic paint pouring, decoupage with decorative napkins, or wrapping with textured yarn offer stunning results with minimal effort. We recommend starting with a simple project to build confidence before tackling more intricate designs that require specialized tools or materials.
Most guides focus on the outside, but here’s a tip we swear by: consider the inside of the vase. A quick coat of spray paint on the interior creates a flawless, high-gloss finish that’s impossible to achieve with a brush.
This technique gives your vase a professional, store-bought look while protecting the exterior from any potential scratches or scuffs during handling.
The biggest misconception is that you need expensive, artist-grade materials. People often overlook the power of proper preparation. Skipping the step of cleaning the glass with rubbing alcohol is a critical mistake. This simple action removes oils and residue, ensuring your paint or adhesive actually sticks for a long-lasting, durable finish instead of peeling or chipping away later.
Now that you have the foundational knowledge for success, you’re ready to get creative. We’ve compiled our favorite techniques, step-by-step instructions, and pro tips to help you transform any simple glass container into a beautiful centerpiece. Let’s dive into the details and start making something amazing for your home.
In This Guide
The Complete Guide to Diy Glass Vase Ideas
Transforming a plain glass vase, bottle, or even a simple jar into a stunning piece of home decor is easier than you might think. DIY glass vase projects are all about upcycling and creativity, allowing you to add a truly personal touch to your space.
Whether you’re aiming for a rustic farmhouse vibe or a sleek modern accent, the right technique can turn a thrift store find or an empty food jar into a bespoke decorative item that looks professionally made.
The possibilities are vast, extending far beyond a simple coat of paint. We encourage you to think about texture and dimension. Materials like jute twine, thick rope, or even sand can add a rustic, coastal feel. For a more delicate approach, consider wrapping vases in lace or applying fabric scraps with decoupage.
The glass itself is merely your canvas; the final aesthetic is determined by the materials you choose to adorn it with.
Before you begin, consider the style of your home. A paint-dipped vase with a sharp, clean line can complement a minimalist interior, while a vase decorated with textured chalk paint and light distressing is perfect for a shabby-chic setting. In our experience, the most successful projects are those that are planned with a specific room or color palette in mind.
Even the simplest techniques can yield incredibly elegant results when they are thoughtfully executed.
Everything You Need to Know Before Starting
Proper preparation is the secret to a flawless finish. Your first step should always be to clean the glass surface meticulously. After washing with soap and water, we strongly recommend wiping the entire vase with isopropyl alcohol on a lint-free cloth.
This crucial step removes any residual oils or fingerprints that can prevent paint and adhesives from bonding correctly, dramatically reducing the risk of peeling or bubbling down the line.
Choosing the right supplies is paramount for durability. When painting, look for products specifically formulated for glass or a high-quality multi-surface acrylic paint. For a smooth, professional-looking application without annoying brush marks, we suggest using a foam pouncer or spouncer instead of a traditional bristle brush.
This method is especially effective when you’re applying solid coats of color and aiming for an even, opaque finish.
Always prioritize safety and a clean workspace. If you’re working with spray paints, sealants, or strong adhesives like E6000, ensure your area is well-ventilated—an open garage or an outdoor space is ideal. We suggest covering your work surface with a drop cloth or several layers of newspaper to protect against spills and overspray.
Having painter’s tape readily available is also a smart move for creating crisp, clean lines and protecting areas you don’t want to paint.
Step-by-Step Breakdown
| Technique | Difficulty Level | Key Materials | Best For |
|---|---|---|---|
| Paint Pouring | Easy | Acrylic paints, pouring medium, plastic cups | Creating vibrant, abstract, one-of-a-kind marble effects. |
| Twine Wrapping | Easy-Medium | Jute twine or rope, hot glue gun, scissors | Achieving a rustic, farmhouse, or coastal aesthetic. |
| Faux Sea Glass | Medium | Sea glass spray paint, matte clear sealer | A soft, translucent, beach-inspired frosted look. |
| Fabric Decoupage | Medium | Fabric scraps, Mod Podge, foam brush | Adding intricate patterns for a bohemian or eclectic style. |
When attempting the paint pouring technique, the consistency of your paint mixture is everything. We find that using a dedicated pouring medium is non-negotiable, as it ensures the paint flows smoothly without compromising color vibrancy. Simply thinning paint with water can result in a separated, blotchy mess.
Practice your color combinations on a piece of scrap cardboard first to see how they will blend before you commit to your final vase.
For a flawless twine-wrapped vase, the key is to work in small sections. Apply a thin, steady bead of hot glue and immediately press the twine into place, holding it tightly against the previous row to prevent gaps. We suggest starting and ending your wrap on what will be the back of the vase for a seamless look.
For an elevated design, try alternating between natural jute and a colored twine for a subtle striped effect.
Achieving an authentic faux sea glass finish requires patience and a light hand. It is far better to apply 2-3 very light coats of sea glass spray paint, allowing adequate drying time between each, than to apply one heavy, drippy coat. After your final color coat is completely dry, we recommend a light mist of a matte clear sealer.
This not only protects the finish but also enhances the beautiful, frosted quality of the effect.
Common Mistakes People Make with Diy Glass Vase Ideas
One of the most frequent errors we see is improper surface preparation. Many DIY enthusiasts jump straight into painting without thoroughly cleaning the glass. Oils from your hands, dust, or leftover sticker residue can prevent paint and adhesives from bonding correctly. We always recommend cleaning the vase with isopropyl alcohol on a lint-free cloth.
This simple step is absolutely crucial for a professional-looking, long-lasting finish and helps avoid frustrating paint peeling later on.
Choosing the wrong type of paint is another common pitfall that leads to disappointing results. Standard craft acrylics might look good initially, but they often scratch off glass surfaces with minimal effort. For a durable design, we suggest using paints specifically formulated for glass, such as FolkArt Enamel or Pebeo Vitrea 160.
These are designed to adhere permanently to non-porous surfaces and create a much more resilient and professional-quality finish.
Finally, people often forget to properly seal or cure their finished project. Even with the right paint, your design is vulnerable without this final step. For a purely decorative vase, a few coats of clear acrylic sealer spray can provide protection. However, if the vase will hold water, the curing process is non-negotiable.
Failing to bake or air-cure the paint as directed means your beautiful work could wash away during its first use.
Pro Tips That Make a Real Difference
To achieve perfectly crisp lines for stripes or geometric patterns, high-quality tape is your best friend. We recommend using a good painter’s tape or even electrical tape for its flexibility. Press the edges down firmly with a fingernail or a credit card to prevent any paint from bleeding underneath.
The real pro move is to remove the tape while the final paint coat is still slightly wet, which ensures a clean pull without lifting the dried paint.
Elevate your vase from simple to stunning by introducing texture. You can achieve a beautiful, ceramic-like finish by mixing a small amount of baking soda or fine sand directly into your paint. Another technique we love is using a sea sponge to dab paint onto the glass, creating a wonderfully mottled, organic effect.
This simple trick adds depth and character, making your DIY piece look like an expensive artisan find.
Instead of just painting on a design, consider using a resist technique for a more sophisticated look. Apply patterns with hot glue, rubber cement, or vinyl stickers before you start painting. Once the paint is completely dry, simply peel off the resist material to reveal the clear glass design underneath.
This method is fantastic for creating intricate patterns or lettering, and the resulting negative space effect looks incredibly chic and professional.
Frequently Asked Questions About Diy Glass Vase Ideas
The best paint really depends on your vase’s intended use. For a durable, top-rack dishwasher-safe finish, we strongly recommend a heat-set enamel paint specifically designed for glass. However, if your vase is purely for decoration and won’t be washed often, a good quality multi-surface acrylic paint followed by a clear sealant spray can suffice.
Always read the paint label to confirm it’s suitable for non-porous surfaces like glass before you begin.
Making a painted vase waterproof comes down to proper curing. Most paints designed for glass will give you two options: air curing or heat setting. While air curing for 21 days works, heat setting in an oven creates a much tougher, more water-resistant bond.
To do this safely, place the cool vase in a cool oven, heat to the recommended temperature (usually around 325°F), bake for 30 minutes, and let it cool completely in the oven.
Yes, you can absolutely remove paint if you make a mistake or want to start over. If the paint is still wet, a damp cloth will usually do the trick. For dried water-based paints, a good soak in hot, soapy water can loosen them.
For cured enamel or stubborn paints, we find that a sharp razor blade scraper (used carefully) or a solvent like acetone will effectively strip the paint, giving you a clean slate for your next idea.
Frequently Asked Questions
What kind of paint works best on glass?
For a durable and vibrant finish, we recommend using paints specifically formulated for glass. Acrylic enamel paints or multi-surface acrylics are excellent choices that adhere well. For a translucent, stained-glass effect, special glass paints are ideal. Always check the label to see if the paint requires heat setting in an oven for a permanent, water-resistant finish.
This step is crucial if you plan to wash the vase or use it for fresh flowers.
How do I get paint to stick to glass permanently?
Proper surface preparation is the most critical step. We advise cleaning the glass thoroughly with rubbing alcohol on a lint-free cloth to remove any oils or residue. This ensures maximum adhesion. After painting, curing the paint is essential.
Most craft acrylics require either air curing for 21 days or can be heat-set in a cool oven that is then brought to temperature, per the manufacturer’s directions, for a permanent, scratch-resistant bond.
Can I put water in a DIY painted glass vase?
Yes, but with some precautions. If you have used a water-resistant paint like an acrylic enamel and have properly cured or heat-set it, the finish will be durable. We strongly recommend only painting the outside of the vase.
This prevents the paint from directly sitting in water, which could cause it to peel over time, and ensures no chemicals from the paint leach into the water, keeping your fresh flowers healthy.
How can I decorate a glass vase without using paint?
There are many beautiful no-paint options we love. You can wrap vases in materials like twine, jute rope, or yarn for a rustic or coastal look, securing the ends with hot glue. For a clean, modern design, create patterns using colorful washi tape or apply pre-made vinyl decals.
Another elegant idea is to use decoupage techniques with decorative paper napkins, applying them with a thin layer of Mod Podge for a sealed finish.
How do I make a glass vase look like ceramic?
Achieving a faux ceramic or pottery look is a popular and surprisingly easy technique. The secret we’ve found is to mix a small amount of baking soda into acrylic paint until you get a thick, gritty consistency. Apply this mixture to the glass with a brush, dabbing or sweeping to create texture.
This method completely transforms a cheap, clear glass vase into what looks like an expensive piece of matte, textured earthenware or stoneware.
Final Thoughts
Transforming a simple glass vase is a wonderfully accessible and rewarding project for any skill level. As we’ve explored, you don’t need expensive supplies to create something truly beautiful for your home. From a simple coat of textured paint to an intricate twine wrap, these DIY ideas empower you to upcycle forgotten items into personalized decor.
We hope these techniques have sparked your imagination and shown just how easy it is to add a unique, handmade touch to any room.
Now it’s your turn to get creative. We encourage you to look around your home for an unused glass jar or a plain vase that’s ready for a makeover. Pick one idea that excites you—perhaps the baking soda paint technique or a simple decoupage design—and gather your supplies. Don’t be afraid to experiment and make the project your own.
The most beautiful result is one that you had fun creating.

Chloe Bennett is an interior stylist and ceramic enthusiast with a passion for curation. She specializes in finding the perfect vases to elevate home spaces, blending contemporary design with vintage aesthetics. Her expert guides help readers select, style, and care for unique vessels that transform ordinary rooms into art.