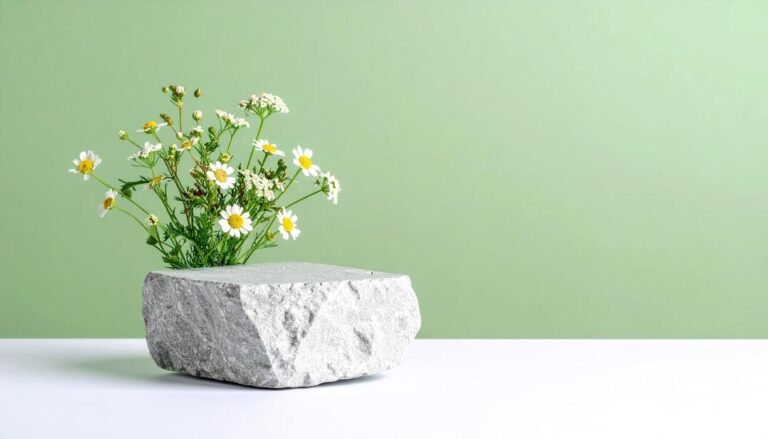
DIY Paint Glass Vase Reviews 2026: Top Picks
A diy paint glass vase is a simple way to turn a plain vase into a custom piece of decor with just paint, a little prep, and a few easy tools. We can create a finished look that feels polished and personal without needing special craft skills or a big budget.
We found that the best results come from choosing the right paint for the glass, cleaning the surface well, and working in thin layers. In our experience, when we recommend a method that fits the vase shape and the look we want, the project feels easier and the finish lasts longer.
One detail most guides skip is how light changes the final look. Glass can make color appear lighter, patchier, or more transparent than it does on the palette, so we like to test a small hidden area first. That quick test helps us avoid surprises once the vase is fully painted.
The biggest mistake with a diy paint glass vase is assuming any paint will stick well without prep. We often see peeling, streaks, or cloudy spots because the glass was dusty or oily, or the coat was too thick. A clean surface and patient drying time matter more than adding extra paint.
Below, we walk through the easiest ways to paint glass, the best materials to use, and the small finishing touches that make the vase look intentional instead of homemade. If we follow the steps in order, we can get a result that feels neat, durable, and genuinely attractive.
In This Guide
- DIY paint glass vase: the easiest way to get a clean, lasting finish
- Paint types for a glass vase : acrylic, glass enamel, spray, and markers
- What to prep before you paint so the color actually sticks
- Simple design ideas for a DIY painted glass vase
- How to seal a painted glass vase without ruining the look
- Fixing drips, streaks, and other painting mistakes
- Ways to style your finished vase so it looks store-bought
DIY paint glass vase: the easiest way to get a clean, lasting finish
A DIY paint glass vase looks best when the finish is planned from the start, not rushed at the end. In our experience, the easiest path to a clean result is to keep the coats thin, even, and fully cured.
Glass is unforgiving, so we suggest choosing a simple shape, working in good light, and rotating the vase as you paint to avoid streaks, drips, and thick edges.
For a finish that lasts, prep matters just as much as paint choice. We recommend washing the vase with warm soapy water, then wiping it down with isopropyl alcohol to remove residue and fingerprints. After that, apply the paint in 2-3 light coats instead of one heavy layer.
This gives better adhesion, faster drying, and a smoother look that feels intentional rather than homemade in the wrong way.
Once the color is on, curing time is the step people skip most often. We suggest letting the vase dry for at least 24 hours before handling it lightly, and up to 7 days for full durability depending on the paint type.
If the vase will hold water, keep paint away from the interior unless the product explicitly says it is water-safe after curing. That one detail can make the difference between a pretty project and a peeling mess.
Paint types for a glass vase
| Paint type | Best for | Pros | Watch out for |
|---|---|---|---|
| Acrylic paint | Decorative vases, hand-painted designs | Easy to find, affordable, good color range | Needs primer or sealing for better durability |
| Glass enamel | Longer-lasting, more durable finishes | Adheres better to glass, can cure to a harder surface | Often needs baking or longer cure time |
| Spray paint | Solid color coverage, modern smooth looks | Fast, even coverage, minimal brush marks | Overspray and drips if applied too heavily |
| Paint markers | Details, lettering, outlines, small patterns | Great control, neat accents, easy corrections | Not ideal for full coverage or very large surfaces |
Acrylic paint is the most approachable option if we want a flexible, budget-friendly project with lots of color choices. It works well for brush-painted stripes, dots, and floral motifs, but it usually benefits from a bonding primer or a sealant if the vase will be handled often.
For a casual decorative piece, acrylic is hard to beat; for a high-wear finish, it needs a little help.
Glass enamel is the stronger option when we want the paint to grip the surface more securely. It is designed for slick materials and often cures to a harder, more durable coating than standard acrylic. That extra durability comes with a tradeoff: it may need heat setting or a longer cure period.
For a vase that will be moved, cleaned, or used regularly, enamel is usually the safer choice.
Spray paint gives the smoothest all-over color, especially on tall or rounded vases, while paint markers are ideal for crisp lines and small decorative details. We suggest using spray paint outdoors or in strong ventilation and applying several light passes from about 8-12 inches away.
Markers are best used on fully cleaned glass, and they shine when we want a refined, hand-drawn look rather than full coverage.
What to prep before you paint so the color actually sticks
The biggest reason paint fails on glass is poor prep, not bad technique. Before anything else, we recommend removing labels, adhesive, dust, and oil from the vase surface. A quick wash with warm water and dish soap is a good start, but it is not enough on its own.
Follow it with rubbing alcohol or vinegar on a lint-free cloth so the surface is truly clean and ready to bond.
After cleaning, think about where the paint will go and how it will be applied. We suggest masking off areas with painter’s tape if you want clean stripes, blocks, or geometric sections. If the vase has a glossy finish, lightly scuffing it with a fine 320-400 grit sandpaper can improve adhesion, but only if the paint system allows it.
The goal is texture, not scratches you can see through the finish.
Finally, set up the workspace before opening the paint. In our experience, a stable surface, paper towels, gloves, and a drying area free from dust make the whole process smoother. Keep humidity low if possible, and avoid painting in very cold rooms because dry times stretch out and the coating can level poorly.
We also suggest planning for multiple thin coats, since the first coat on glass almost always looks patchy and uneven.
Simple design ideas for a DIY painted glass vase
For a first project, we recommend starting with clean, high-contrast shapes that look intentional even if the lines are not perfect. Simple stripes, half-dipped bases, dots, and thin geometric bands all work beautifully on glass. A single color on a clear vase can feel modern, while two or three coordinating shades create a more polished look.
Less detail often reads as more refined on curved surfaces.
One of the easiest approaches is a color-blocked vase: tape off one section, paint it matte white, black, blush, or sage, and let the glass show through the rest. We also like frosted effects using translucent paint for a softer finish. If you want a more decorative look, try painter’s tape to create chevrons, angled panels, or a subtle grid.
These patterns are forgiving and still look custom.
Seasonal motifs can be simple too. Tiny leaf sprigs for spring, warm terracotta bands for fall, or metallic accents for holiday styling can make the vase feel curated without overcomplicating the process. In our experience, limiting the palette to two main colors plus one accent keeps the design balanced.
Before painting, sketch the layout on paper and wrap it loosely around the vase to check proportions.
How to seal a painted glass vase without ruining the look
Sealing a painted glass vase is all about protecting the finish while keeping the surface looking smooth, not plastic. We suggest choosing a clear, non-yellowing sealer that matches the paint type—spray acrylic for most craft paints, or a compatible water-based sealer if you used specialty glass paint.
Apply in very light coats so the design stays crisp and the color depth remains visible.
Before sealing, make sure the paint has cured fully, not just dried to the touch. That can take 24 to 72 hours, depending on the paint and humidity. A rushed seal can trap moisture and cause clouding or tackiness.
For the best results, place the vase in a dust-free area, shake the sealer well, and spray from about 8 to 12 inches away in quick passes rather than one heavy coat.
If you want a softer, hand-finished appearance, we recommend a satin or matte sealer; gloss can look too shiny on decorative vases and emphasize brush marks. Rotate the vase as you spray to avoid drips on the underside and rim. Two to three thin coats are usually enough, with a few minutes between applications.
Thin coats preserve the hand-painted look far better than one thick coat.
Fixing drips, streaks, and other painting mistakes
Drips are easiest to correct while the paint is still wet. Keep a small brush, cotton swabs, and a damp cloth nearby so we can remove excess paint quickly before it sets. If a drip has already started to run, gently lift it with the corner of a brush rather than wiping broadly, which can spread the mess.
For acrylic paint, a fast cleanup often saves the whole section.
Streaks usually mean the paint is too thin, the coat is too dry, or the brush is overloaded. We suggest applying two or three thin coats instead of trying to cover everything in one pass. Let each coat dry for the recommended time, usually 15 to 30 minutes for craft acrylics, and use smooth strokes in one direction.
A soft foam brush can help reduce visible brush marks on glass.
Once the paint has dried, small mistakes are still fixable. Light sanding with very fine-grit sandpaper can smooth a raised drip, but only if the design allows for it. For stubborn spots, paint over the area with a matching color and feather the edges outward.
If the error is major, we often find it easier to repaint the entire section and turn the mistake into a deliberate design element, like a band or accent shape.
Ways to style your finished vase so it looks store-bought
To give a diy paint glass vase a polished, retail-ready feel, we recommend starting with the silhouette around it. A single stem, a small bundle of eucalyptus, or 3 to 5 dried florals instantly makes the vase look intentional rather than handmade.
Clear water, evenly trimmed stems, and a placement on a tray or shelf help it read like a curated décor piece instead of a craft project.
Color pairing matters just as much as the vase itself. We suggest matching the painted finish to nearby accents, such as brass, wood, or linen, so the vase feels integrated into the room. For a more store-bought look, keep the styling restrained: one vase, one focal arrangement, and a simple backdrop.
Clean negative space is often what makes a DIY piece look expensive.
Finishing touches can elevate the whole presentation. In our experience, a thin ribbon of jute, velvet, or twine around the neck adds texture without looking overdone, especially when the vase is used as a gift. If the paint finish is matte, pair it with glossy greenery; if it is glossy, choose soft, muted stems.
A final wipe to remove fingerprints and dust keeps the surface looking crisp and professionally styled.
Frequently Asked Questions
What kind of paint do we use for a DIY painted glass vase?
We recommend using acrylic paint, glass paint, or enamel paint made for slick surfaces. Acrylics are easy to find and work well for decorative pieces, while glass-specific paints usually give better adhesion and durability. If we want a longer-lasting finish, we should look for a paint labeled for glass or ceramics and follow the curing instructions carefully.
How do we prepare a glass vase before painting?
We should start by washing the vase with warm soapy water, then dry it completely. After that, wiping the surface with rubbing alcohol helps remove oils and residue that can prevent paint from sticking. If the vase has a glossy surface, a light scuff with fine-grit sandpaper can improve adhesion.
Clean preparation makes a big difference in how smooth and durable the painted finish looks.
Do we need to prime a glass vase before painting it?
Priming is not always required, but it can help if we want better coverage and adhesion. A glass primer or bonding primer is useful for glossy surfaces and darker vases where we plan to use lighter colors. For small decorative projects, some paints work well without primer.
If we want the best chance of a lasting finish, especially on a frequently handled vase, primer is worth using.
How do we seal a painted glass vase?
We can seal a painted glass vase with a clear acrylic sealer or a spray sealant made for painted surfaces. This helps protect the design from scratches, moisture, and fading. For pieces that stay decorative and dry, a light spray coat is usually enough.
If the vase may be handled often, we should use multiple thin coats and let each layer cure fully before using it.
How do we make sure the paint does not peel off a glass vase?
We’ve found that peeling usually happens when the vase is not cleaned well, the wrong paint is used, or the paint is not cured long enough. To avoid that, we should clean the surface thoroughly, use paint made for glass, apply thin coats, and let the vase dry for the full recommended time.
Baking the vase, if the paint instructions allow it, can also improve durability.
Final Thoughts
A DIY painted glass vase is an easy way to add color and personality to a room without spending much. In our experience, the best results come from careful prep, the right paint, and patience between coats. Even simple designs can look polished when we keep the lines clean and the finish consistent.
It’s a small project, but it can make a big visual impact.
If we are ready to start, we can choose a vase shape, pick a color palette, and gather supplies before painting. Taking a little time to prep and seal the surface will help the final piece last longer. We recommend starting with one vase, learning what works, and then trying new patterns or techniques on the next one.
Chloe Bennett is an interior stylist and ceramic enthusiast with a passion for curation. She specializes in finding the perfect vases to elevate home spaces, blending contemporary design with vintage aesthetics. Her expert guides help readers select, style, and care for unique vessels that transform ordinary rooms into art.