Glass Vase DIY Projects: Top Reviews for 2026
glass vase diy projects are simple ways to turn plain, inexpensive vases into custom decor with paint, texture, frosted finishes, or layered embellishments. The best part is that we can change the look in an afternoon and make something that feels polished, personal, and far more expensive than it really was.
In our experience, the strongest projects start with a clear style goal: modern, rustic, romantic, or minimal. We found that choosing one finish and one accent keeps the vase looking intentional instead of busy. We recommend matching the vase shape to the design, since even a small change in silhouette can make the whole piece feel more elevated.
Here’s the insider detail most guides miss: surface prep matters more than the decoration itself. A vase that’s cleaned with alcohol, dried fully, and lightly scuffed where needed will hold paint, adhesive, and seals much better. We also recommend testing color on the bottom edge first, because glass can shift the tone once it catches the light.
The biggest misconception about glass vase diy projects is that they have to be complicated to look good. They don’t. The real mistake is overloading a vase with too many techniques at once. A single clean finish, applied carefully, usually looks more refined than a crowded mix of ribbons, beads, glitter, and paint.
Below, we’ll walk through the easiest styles, the best supplies, and the smart techniques that help each vase look finished instead of homemade. If we keep the process simple and deliberate, we can create pieces that work as gifts, centerpieces, or everyday decor.
In This Guide
- Easy glass vase DIY projects you can start today
- Quick comparison of glass vase DIY project styles
- Painting, frosting, and decoupage ideas that look polished
- How to turn thrifted glass vases into custom decor
- Supplies that make glass vase DIY projects easier
- Common mistakes that crack, chip, or ruin the finish
- Gift-worthy glass vase DIY projects for any occasion
Easy glass vase DIY projects you can start today
One of the easiest ways to refresh a plain vase is to give it a new surface treatment. We suggest starting with painter’s tape, spray paint, or adhesive vinyl, because each option can transform a basic clear vase in under an hour.
A single coat of matte white, smoky gray, or muted terracotta instantly makes the piece feel intentional, and it works especially well on thrifted or recycled glass.
For a more textured look, we recommend simple wraps and add-ons such as jute twine, leather strips, or ribbon accents. These projects are forgiving, require minimal tools, and still look polished when the spacing is even. In our experience, wrapping only the lower third of the vase gives it a balanced, designer-inspired finish without hiding the glass entirely.
It’s a smart option for centerpieces and shelf styling.
If you want a project with a little more visual payoff, try a frosted ombré effect or a hand-painted geometric pattern. Both can be done with spray frosted glass paint, sponges, or fine masking tape, and they create depth without feeling busy. We suggest keeping the palette restrained—two or three tones max—so the vase still reads as elegant.
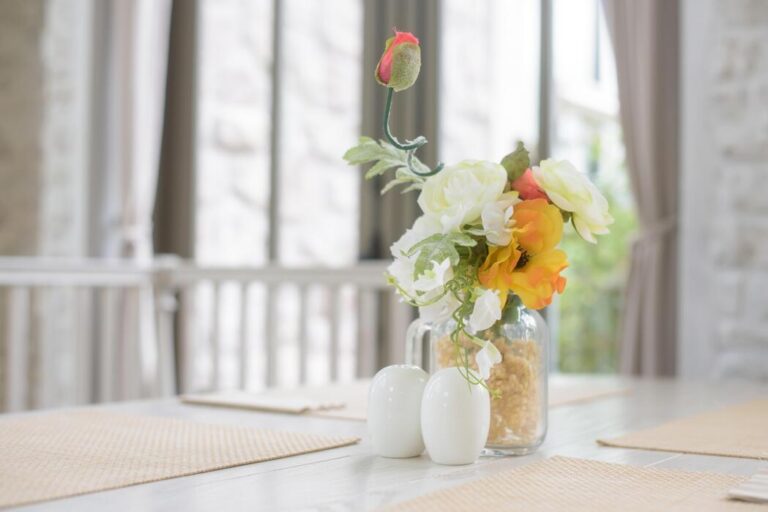
A few stems are usually enough to complete the look.
Quick comparison of glass vase DIY project styles
| Project style | Difficulty | Best for | Finish time |
|---|---|---|---|
| Spray-painted solid color | Easy | Modern decor, quick refreshes | 20-40 minutes |
| Frosted glass effect | Easy | Soft, minimal styling | 30-45 minutes |
| Decoupage with paper or napkins | Moderate | Pattern, texture, personalized design | 45-90 minutes |
| Twine or ribbon wrap | Very easy | Rustic, farmhouse, boho accents | 15-30 minutes |
The best project style usually comes down to how much time and precision we want to invest. If speed matters, solid paint or simple wraps are the most forgiving choices, and they hide imperfections well. For a softer decorative effect, frosting gives a clean finish that looks expensive with very little effort.
We often suggest starting with one vase before committing to a full matching set.
Decoupage and layered embellishments offer more personality, but they also require a steadier hand and a bit more patience. In our experience, these styles work best when the base shape is simple and the pattern scale is controlled. Larger glass vases can handle bolder designs, while smaller bud vases usually look best with subtle details.
Keeping the overall palette tight makes every style feel more polished.
For beginners, the most reliable rule is to match the technique to the vase shape. Tall cylindrical vases are ideal for masking tape patterns and frosted gradients, while round bell-shaped vases suit wraps and floral paper motifs. We recommend choosing one main effect and letting it lead the design. That approach keeps the project looking cohesive instead of overly decorated.
Painting, frosting, and decoupage ideas that look polished
Painted vases look most refined when the finish is deliberate, not heavy. We suggest using thin coats of spray paint or acrylic applied with a foam brush, allowing each layer to dry before adding the next. Matte finishes tend to feel more modern, while satin reads a little softer.
Clean edges, especially around the rim, make even a simple color block look professionally done.
Frosting is a great way to create privacy for stems while keeping the vase light and airy. A frosted glass spray works well when applied in light, misted passes, and masking off sections can create crisp bands or negative-space patterns. We recommend combining frosted areas with clear glass for contrast, rather than frosting the entire vase.
That mix adds dimension and keeps the piece from looking flat.
Decoupage can look surprisingly upscale when we keep the paper choice elegant and the placement intentional. Thin tissue, botanical napkins, or neutral tissue prints work especially well because they blend into the glass instead of sitting on top of it. We suggest sealing the final layer with a clear topcoat for a smoother sheen.
When trimmed neatly, the result feels handcrafted in the best way, not homemade.
How to turn thrifted glass vases into custom decor
Thrifted glass vases are one of the easiest ways to create custom decor without spending much, and we recommend starting with shapes that already have good proportions. A tall cylinder can become a modern centerpiece, while a short bud vase works well for shelves or bedside styling.
Before decorating, wash the vase with warm water and dish soap, then wipe it with isopropyl alcohol so paint, adhesive, or wax grips properly.
From there, the transformation usually comes down to one finish choice. For a frosted look, we suggest using glass etching cream or a matte spray designed for slick surfaces. If you want color, apply 2 to 3 thin coats of spray paint rather than one heavy pass.
In our experience, thin layers dry more evenly, resist drips, and give thrifted glass a more polished, store-bought appearance.
Simple add-ons can make the biggest visual difference. Try wrapping the neck with jute, painter’s tape stripes, or textured paint pen details for a custom pattern. You can also use adhesive vinyl for labels, initials, or geometric shapes.
We suggest sealing the finish with a clear protective coat if the vase will be handled often, since that helps prevent scratches and keeps the surface looking clean longer.
Supplies that make glass vase DIY projects easier
A few dependable supplies make glass vase DIY projects much smoother from the start. We always recommend glass cleaner, rubbing alcohol, painter’s tape, fine-grit sandpaper, and a lint-free cloth for prep. For color work, choose paint specifically labeled for glass or multi-surface use.
A small foam brush, spray primer, and disposable gloves also help keep fingerprints and streaks off the final finish.
For projects that need precision, the right tools save time and reduce mess. A craft knife, self-healing cutting mat, and flexible measuring tape make it easier to place vinyl, tape, or trim evenly around curved glass. We also suggest having microfiber cloths and cotton swabs on hand for quick cleanup around tight spots.
When details matter, those small tools can be the difference between amateur and refined.
Finishing supplies matter just as much as the decorative ones. A clear acrylic sealer in matte, satin, or gloss helps protect painted surfaces from chips and moisture. If you’re adding sand, pebbles, dried flowers, or beads inside the vase, use a funnel for cleaner placement.
In our experience, keeping a tray, newspaper, or silicone mat underneath the workspace makes cleanup easier and protects the table from overspray and glue.
Common mistakes that crack, chip, or ruin the finish
One of the biggest mistakes is rushing prep work. Glass that still has dust, grease, or old adhesive will cause paint and glue to fail early. We recommend washing the vase, drying it completely, and wiping it with alcohol before starting.
Another common issue is painting a cold vase straight from storage; sudden temperature changes can stress the glass, especially with thin thrifted pieces. Let it acclimate to room temperature first.
Using too much product is another finish killer. Heavy coats of spray paint or sealer tend to pool, wrinkle, or leave sticky spots that never fully cure. We suggest multiple light coats with 10 to 15 minutes between passes, following the label directions. It’s also easy to over-handle wet glass.
In our experience, setting the vase aside for at least 24 hours before moving it prevents smudges and fingerprints.
Tool choice can also damage the vase if we’re not careful. Sharp metal scrapers, aggressive sanding, or low-quality tape can chip edges or leave visible scratches. For delicate glass, use gentle pressure and remove tape slowly at a 45-degree angle once the paint is tacky, not fully hard.
Finally, avoid placing finished vases in dishwashers or direct heat, since both can weaken coatings and shorten the life of the project.
Gift-worthy Glass Vase DIY Projects for Any Occasion
A glass vase DIY project makes a thoughtful gift because it feels personal without requiring a huge budget. We suggest starting with a clean, clear vase and choosing a style that matches the occasion: soft florals for birthdays, metallic accents for anniversaries, or a minimalist frosted look for housewarmings.
In our experience, the best gift pieces look polished but still show a handmade touch.
For a quick but elevated result, we recommend using glass paint, adhesive vinyl, or a simple frosted spray finish. A single vase can be transformed in under 2 hours, especially if you plan the design first with painter’s tape.
We found that pairing the vase with one or two stems, dried lavender, or a small bouquet instantly makes the gift feel complete and ready to present.
To make the project even more memorable, add a detail that reflects the recipient’s style, such as a name, date, quote, or color palette they love. We suggest keeping the design durable by sealing painted areas and allowing 24 hours of drying time before wrapping.
Small custom touches often have the biggest impact, turning a simple vase into a keepsake that works for weddings, thank-you gifts, and celebrations alike.
Frequently Asked Questions
How do you decorate a glass vase for a DIY project?
We usually start with a clean glass vase and choose one simple technique, such as paint, twine, stickers, or etched designs. Before decorating, we recommend wiping the surface with rubbing alcohol so adhesives and paint stick better. From there, we can layer materials, add dried flowers, or seal the finish with a clear coat for longer-lasting results.
What paint works best on a glass vase?
For most glass vase DIY projects, we find that acrylic paint, enamel paint, and glass-specific paint all work well. Acrylic is easy to use, but it may need a sealant for durability. Glass paint tends to hold up better over time. To improve adhesion, we recommend lightly sanding the surface or using a primer designed for smooth materials.
How do you frost a glass vase at home?
We can frost a vase using frosted glass spray, etching cream, or adhesive vinyl with a stencil. Spray frosting is the easiest method for beginners and gives a soft, even look. If we want a more permanent effect, etching cream works well, but we should follow the safety directions carefully. Always work in a ventilated area and protect surrounding surfaces.
What can I put inside a decorated glass vase?
Decorated vases can hold much more than flowers. We often use dried stems, fairy lights, candles, decorative stones, colored sand, or seasonal fillers like ornaments and pinecones. If the vase is narrow, single-stem flowers or branches look best. For a centerpiece, we recommend matching the filler to the color and style of the vase so the design feels balanced.
How do I seal a DIY glass vase so the design lasts?
To help a DIY glass vase last longer, we recommend using a clear acrylic sealer, especially if paint, glitter, or decoupage is involved. Spray sealers usually give the most even finish. After decorating, let the vase dry completely before sealing it.
If the vase may hold water or be cleaned often, choosing waterproof materials from the start makes a big difference.
Final Thoughts
Glass vase DIY projects give us a simple way to turn everyday pieces into something personal and useful. Whether we prefer painted finishes, frosted details, or natural textures like twine and dried flowers, the best results usually come from keeping the design clean and letting the vase shape stand out.
In our experience, small changes can make a big visual impact without requiring advanced crafting skills.
If we are just getting started, we recommend choosing one technique and practicing on a single vase first. That approach makes it easier to build confidence and find a style we enjoy. Once the basics feel comfortable, we can mix materials, try seasonal designs, and create pieces that fit our home or make thoughtful handmade gifts.
Chloe Bennett is an interior stylist and ceramic enthusiast with a passion for curation. She specializes in finding the perfect vases to elevate home spaces, blending contemporary design with vintage aesthetics. Her expert guides help readers select, style, and care for unique vessels that transform ordinary rooms into art.