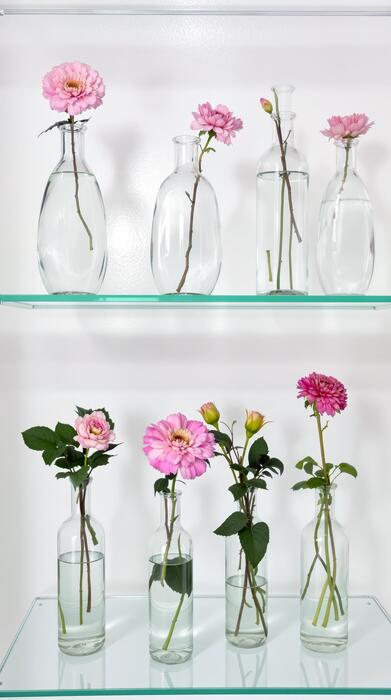
DIY Ceramic Coating Vase Review 2026: Top Picks
A diy ceramic coating vase project is simply a way to add a sleek, protective finish to a vase using a ceramic-style coating you apply at home. It can boost shine, improve durability, and make a plain vase look high-end without professional equipment. Done right, it gives you a smooth finish that resists light wear and cleaning.
We found that the best results come from matching the coating to the vase material and the look we want, whether that’s glossy, satin, or ultra-smooth. In our experience, the prep matters more than the product name. We recommend treating this as a finish system, not just a quick paint-on upgrade, if we want lasting results.
One tip most guides miss: edge control makes a bigger difference than the coating itself. We recommend paying extra attention to the rim, base, and any curves where product tends to pool. A thin, even first pass usually beats a heavy coat, especially on decorative vases where streaks and drips show fast.
The biggest misconception about diy ceramic coating vase projects is that the coating will hide flaws. It won’t. If the surface has dust, oil, scratches, or uneven texture, the final finish often highlights them. We see this happen when people skip sanding, cleaning, or curing and expect the coating to do all the work.
If we want a vase that looks polished instead of patchy, we need a clear process from prep to cure. Below, we break down the tools, product choices, application steps, and the small fixes that keep a simple DIY project looking clean and professional.
In This Guide
- DIY ceramic coating vase: the fastest way to get a smooth, durable finish
- Tools, supplies, and which ceramic coating products are actually worth buying
- Surface prep that makes or breaks a DIY ceramic coating vase project
- Quick comparison of coating types, gloss levels, and cure times
- Step-by-step: applying ceramic coating to a vase without streaks or bubbles
- Where DIY ceramic coating vase projects go wrong and how to fix them
- Care, curing, and cleaning tips to keep the finish looking new
DIY ceramic coating vase: the fastest way to get a smooth, durable finish
A DIY ceramic coating vase project works best when we treat it like a finish system, not just a product wipe-on. The fastest route is to start with a clean, fully cured vase, level the surface, then apply a thin ceramic coating layer in controlled passes.
When the prep is solid, the coating levels better, flashes more evenly, and leaves that glass-smooth look people want without heavy polishing afterward.
For speed, we recommend working in a dust-free space at around 65–75°F with moderate humidity. That window gives most coatings predictable flash times, usually around 1 to 3 minutes before leveling. Use a microfiber applicator, overlap each stroke slightly, and keep the coat thin; heavy application is the most common reason for streaks, high spots, and wasted product.
One light coat is usually better than one thick coat.
In our experience, the quickest durable finish comes from a simple sequence: clean, decontaminate, lightly scuff if needed, apply coating, inspect under bright light, then cure undisturbed. If the vase will be handled often, adding a second coat after the manufacturer’s recoat window can improve uniformity and resistance to fingerprints.
The goal is even coverage, not maximum product use, because thin films cure harder and look more refined.
Tools, supplies, and which ceramic coating products are actually worth buying
The core tools are refreshingly simple: microfiber towels, a soft applicator block, nitrile gloves, isopropyl alcohol or panel wipe, a gentle cleaner, and optionally a fine abrasive pad if the vase needs scuffing. We also suggest having bright inspection lighting and a timer, because ceramic coating work is less about muscle and more about timing.
A clean workspace matters just as much as the brand on the bottle.
When it comes to product selection, we think the best ceramic coatings for vases are the ones designed for hard, nonporous surfaces and easy leveling. Look for clear instructions, a workable flash time, and a reputable durability claim backed by real application guidance. Avoid products that sound overly “all-in-one” but offer little detail on cure time or surface compatibility.
A good coating should spread evenly and not force us to fight high spots.
For most DIY vase projects, a compact 30 mL to 50 mL kit is enough, especially if we’re coating one or two decorative pieces. Premium coatings often cost more, but the better ones usually buy us easier wipe-off, fewer streaks, and a cleaner final gloss.
If the vase is decorative only, we do not need the toughest automotive-grade formula; a midrange coating with strong leveling and good UV resistance is usually the smartest purchase.
Surface prep that makes or breaks a DIY ceramic coating vase project
Surface prep is where most DIY ceramic coating vase failures begin, and it’s also where we can win the project before the coating ever comes out. Start by washing the vase with a mild, residue-free cleaner to remove dust, oil, and fingerprints. Then dry it completely.
Any leftover soap film or moisture can interfere with bonding and leave the finish patchy, hazy, or prone to early wear.
If the vase already has gloss, we usually recommend a light scuff with a fine abrasive pad or ultra-fine polish only when needed, especially on slick glazed ceramics. The aim is not to remove the finish, but to create enough bite for adhesion.
After that, wipe the surface with isopropyl alcohol or a panel prep solution and inspect under angled light. If the towel still picks up residue, keep cleaning.
Pay close attention to edges, rims, and textured areas, since those are the spots where coating tends to pool or thin out. We suggest masking the base if the vase will sit on furniture, and handling it with gloves from this point forward to avoid re-contamination.
A perfectly applied coating can still fail if dust lands on it or fingerprints get trapped underneath, so clean hands and clean surfaces are nonnegotiable.
Quick comparison of coating types, gloss levels, and cure times
| Coating type | Typical gloss level | Initial dry / handle time | Full cure time |
|---|---|---|---|
| Spray ceramic coating | High-gloss to mirror-like | 15–30 minutes | 24–48 hours |
| Wipe-on liquid ceramic coating | Satin to high-gloss | 30–60 minutes | 48–72 hours |
| Brush-on ceramic sealer | Low sheen to satin | 1–2 hours | 72 hours to 7 days |
| Professional-style ceramic topper | Very high-gloss | 30–45 minutes | 7 days |
When we compare coating options for a diy ceramic coating vase, the biggest differences are usually finish, application control, and cure time. Spray products tend to give the brightest gloss, but they can be less forgiving on curved surfaces if we apply too heavily.
Wipe-on formulas are often easier for beginners because we can control the amount more precisely, especially around the neck and base.
Gloss level matters more than people expect. A high-gloss coating can make a vase look polished and modern, while a satin finish feels softer and more handcrafted.
For decorative vases, we usually suggest choosing the finish that matches the room’s lighting: glossy coatings pop in bright spaces, while satin reads better in muted interiors and hides tiny application marks more effectively.
Cure time is where patience pays off. Even if a vase feels dry in under an hour, it may still be vulnerable to fingerprints, water spots, or dull patches until fully cured. In our experience, 24 to 72 hours is the realistic window for most DIY coatings, but thicker brush-on products can take up to 7 days.
We recommend planning the project so the vase stays untouched during that time.
Step-by-step: applying ceramic coating to a vase without streaks or bubbles
Start with a spotless vase, because any dust, oil, or old residue will show through the coating. We suggest washing it with mild soap, rinsing well, and wiping it down with isopropyl alcohol or a paint-safe degreaser. Let it dry completely, then work in a low-dust area with good lighting.
A clean microfiber cloth, nitrile gloves, and a foam applicator pad help keep the finish even from the start.
Apply the coating in thin, overlapping passes rather than one wet layer. On a curved vase, we like to work in sections: neck, shoulders, body, and base. Use light pressure and keep the applicator moving to avoid puddling. If the product flashes quickly, level it within the first 30 to 60 seconds.
That small timing detail is often what separates a glassy finish from a streaky one.
To avoid bubbles, do not shake the bottle aggressively; instead, roll it gently between your hands if the instructions allow it. Bubbles usually come from overworking the surface, using too much product, or applying over porous areas that trap air.
If we see a bubble right away, we suggest lightly dragging the applicator once over the spot, then leaving it alone. Let the vase cure in a dust-free place and resist the urge to touch up too soon.
Where DIY ceramic coating vase projects go wrong and how to fix them
One common mistake is applying the coating over a surface that is not fully prepped. Fingerprints, leftover wax, and fine dust can cause fisheyes, dull patches, or peeling later on. If that happens, we recommend letting the coating cure, then gently sanding the problem area with 1000–2000 grit paper, cleaning it again, and recoating in thinner layers.
Skipping prep usually costs more time than doing it right the first time.
Another frequent issue is overapplication. A coating that looks wet and dramatic at first can dry unevenly, leaving drips, edge buildup, or cloudy streaks. The fix is simple but disciplined: use less product, wipe off excess immediately, and keep the vase horizontal or slowly rotating while it levels.
For tall decorative pieces, we suggest working from top to bottom so any excess moves into areas we can manage more easily.
Heat, humidity, and impatience also create problems. If the room is too humid, the coating may haze or cure slowly; if it is too cold, it may not level properly. We recommend aiming for a stable environment around 65–75°F with moderate humidity.
If the finish looks uneven after curing, a light polish or a very thin second coat often restores the gloss. The key insight is simple: thin coats and controlled conditions solve most DIY failures.
Care, curing, and cleaning tips to keep the finish looking new
The first thing we recommend is giving the coating a full cure time before the vase sees any real use. Even if it feels dry to the touch in a few hours, most ceramic coatings keep hardening for 24 to 72 hours, and some continue to improve for up to a week.
In our experience, keeping it in a clean, dust-free spot during that window helps prevent fingerprints, scuffs, and trapped debris that can dull the final look.
Once cured, gentle cleaning is the key to preserving that glossy, sealed finish. We suggest wiping the vase with a soft microfiber cloth and a small amount of mild soap and lukewarm water. Avoid abrasive pads, magic-eraser-style sponges, and harsh chemicals like ammonia or bleach, since they can haze the coating over time.
For dried dust or residue, a damp cloth followed by a dry buff usually restores the shine without stressing the surface.
To keep the finish looking new longer, handle the vase with clean, dry hands and avoid dragging it across shelves or tabletops. We also recommend using a felt pad, silicone mat, or display tray underneath if the vase sits on a hard surface, especially in high-traffic areas.
If water is used inside the vase, empty it promptly and dry the interior fully; standing moisture can creep into seams and gradually undermine even a well-applied DIY ceramic coating.
Frequently Asked Questions
Can we apply ceramic coating to a vase at home?
Yes, we can apply a ceramic coating to a vase at home if we prepare the surface properly and follow the product instructions closely. In our experience, the key steps are cleaning, drying, applying thin coats, and allowing full cure time.
We recommend working in a dust-free area and testing the coating on a small spot first, especially if the vase is painted, glazed, or decorative.
What is the best ceramic coating for a vase?
The best ceramic coating for a vase depends on the vase material and how it will be used. For decorative vases, we usually look for a water-based coating with strong clarity and scratch resistance.
If the vase will hold water or fresh flowers, we recommend checking that the product is water-resistant and safe for the intended surface, such as glass, ceramic, or terracotta.
Do we need to sand a vase before ceramic coating it?
Sometimes, yes. If the vase has a glossy finish, light sanding can help the coating adhere better. For unglazed ceramic or porous surfaces, sanding may not be necessary, but cleaning is still essential. We’ve found that a smooth, dust-free surface gives the best results. Always follow the coating manufacturer’s prep guidelines, since some finishes need different surface preparation.
How long does DIY ceramic coating take to cure on a vase?
Most DIY ceramic coatings need at least 24 hours to dry enough for light handling, but full curing can take several days. We recommend avoiding water, dust, and heavy contact during that time. Cure time varies by product, humidity, and temperature, so checking the label is important.
In our experience, patience during curing makes a big difference in durability and finish quality.
Can a ceramic-coated vase still hold water?
Yes, many ceramic-coated vases can still hold water, but only if the coating is designed for water exposure and fully cured. We recommend confirming that the product is safe for interiors or decorative items that will contact water. If the vase is used for fresh flowers, it’s smart to test for leaks after curing.
Some coatings protect the exterior only and are not meant for the inside.
Final Thoughts
DIY ceramic coating for a vase can be a simple way to improve durability, add shine, and protect the finish from everyday wear. We’ve found that the best results come from careful surface prep, thin even coats, and enough cure time.
Whether the vase is decorative or functional, choosing the right ceramic coating for the material makes the project smoother and the finish more reliable.
If we take the time to clean, prep, and cure properly, the finished vase can look polished and last longer. A good next step is to test the coating on a small, hidden area before treating the whole piece. From there, we can work slowly, follow the product directions, and enjoy a result that feels both practical and personal.
Chloe Bennett is an interior stylist and ceramic enthusiast with a passion for curation. She specializes in finding the perfect vases to elevate home spaces, blending contemporary design with vintage aesthetics. Her expert guides help readers select, style, and care for unique vessels that transform ordinary rooms into art.