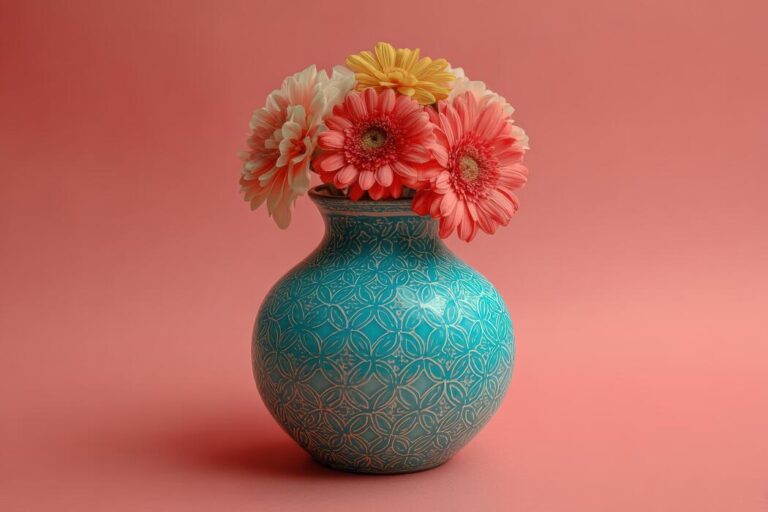
How to Arrange Lily in a Vase: 2026 Reviews
If you want to know how to arrange lily in a vase, start by trimming the stems, removing any leaves below the waterline, and placing the lilies in a clean vase with cool water. Then space the stems so the blooms can open naturally, with the tallest flower in the center or slightly off-center for a balanced look.
We found that the best lily arrangements look simple, not crowded. We recommend starting with fewer stems than you think you need, then adjusting as the blooms open. In our experience, lilies look freshest when we give each stem room, steady support, and a vase shape that matches their height and spread.
One detail most guides miss is that lily buds keep changing after they’re arranged. We like to place a mix of open blooms and tight buds so the vase evolves over several days. That slow opening effect makes the arrangement feel fuller, longer, and far more natural than a vase packed with only fully open flowers.
The biggest mistake when learning how to arrange lily in a vase is overstuffing the container. More stems do not always mean a better display. We also see people leave pollen, extra leaves, or damaged petals in place, which can make the arrangement look messy and shorten its life.
With that in mind, we’ll walk through the practical steps below, from choosing the right vase to keeping the flowers fresh. If we want lilies to look elegant instead of awkward, the details matter—and the good news is that each one is easy to manage once we know what to do.
In This Guide
- How to Arrange Lily in a Vase for a Clean, Full Look
- Choosing the Right Vase, Water Level, and Stem Height
- Open Blooms vs. Tight Buds: Which Lilies to Place First
- How to Trim, Clean, and Condition Lily Stems Before Arranging
- Building a Balanced Lily Arrangement Without Crowding the Vase
- Keeping Lilies Fresh Longer After You Arrange Them
- Fixing Droopy Lilies, Pollen Mess, and Other Common Problems
How to Arrange Lily in a Vase for a Clean, Full Look
For a clean, full look, we recommend starting with a vase that gives the stems room to fan out without collapsing inward. Trim the lilies so the tallest stems sit about 1.5 to 2 times the vase height, then remove any leaves that would sit below the waterline.
This keeps the arrangement looking crisp and helps prevent cloudy water, which can shorten bloom life quickly.
Next, build the shape in layers rather than stuffing all the stems in at once. We suggest placing the strongest, most upright stems near the center first, then adding slightly shorter stems around the outside to create a soft dome. Rotate the vase as you work so the arrangement looks balanced from every angle.
A little negative space between stems makes lilies look elegant instead of crowded.
To finish, adjust the open blooms so their faces are angled at slightly different directions, not all pointed the same way. We find this gives the arrangement more depth and a naturally abundant feel. If any stems bend too far outward, recut them a touch shorter and reposition them.
A light touch is usually better than overpacking; lilies look best when each flower has space to breathe.
Choosing the Right Vase, Water Level, and Stem Height
The right vase makes a bigger difference than many people expect. We suggest choosing a vase with a neck that is narrow enough to support the stems, but not so tight that they pinch together. A cylindrical vase works well for modern styling, while a slightly rounded vase gives a softer, fuller silhouette.
For most lily arrangements, aim for a vase that is one-third to one-half the eventual total height of the display.
Water level matters just as much. Fill the vase with 2 to 4 inches of clean, cool water for most cut lilies, or enough to cover the lower stem ends without submerging any leaves. In our experience, lilies last longer when the water is changed every 1 to 2 days.
Fresh water helps the stems drink properly and keeps the arrangement looking clear and polished.
Stem height should suit both the vase and the room where the arrangement will sit. As a practical rule, we recommend cutting the stems so the lilies rise about 1.5 times the vase height for a compact look, or up to 2 times for something more dramatic.
If the stems are too long, the arrangement can feel top-heavy; too short, and the blooms lose presence.
Open Blooms vs. Tight Buds: Which Lilies to Place First
| Bloom Stage | Best Placement | Main Advantage | Arrangement Tip |
|---|---|---|---|
| Fully open blooms | Center or focal points | Instant visual impact | Use sparingly so they do not overpower the design |
| Half-open blooms | Middle layer | Natural transition between stages | Angle them outward for a fuller silhouette |
| Tight buds | Outer edges or back | Extends the life of the arrangement | Place higher in the vase so they can open freely |
| Mixed stems | Across the arrangement | Creates movement and depth | Balance 1 open bloom with 2-3 buds for a natural look |
When arranging lilies, we usually place the open blooms first if we want the vase to look finished right away. Those flowers establish the shape and give us clear reference points for height and balance.
From there, we add half-open blooms to soften the structure, then tuck in tighter buds where they can open gradually without crowding the center of the design.
Tight buds are especially useful when we want the arrangement to last longer. We recommend placing them slightly higher or farther out so they have space to unfurl naturally. If buds sit too low or too close together, they can bend awkwardly as they open.
The best results come from mixing stages intentionally, not randomly filling the vase with whatever stem is longest.
In practice, a balanced mix often works best: one or two fully open lilies for drama, several half-open blooms for softness, and a few tight buds to keep the arrangement evolving. We find this approach makes the vase feel fuller over time, not just on day one.
It also helps the display stay attractive longer, since new buds continue joining the composition as older flowers fade.
How to Trim, Clean, and Condition Lily Stems Before Arranging
Start by unwrapping the lilies and inspecting each stem for damaged leaves, bruised petals, or any soft spots near the base. We recommend removing any foliage that would sit below the waterline, since submerged leaves break down quickly and can cloud the vase.
Using a sharp, clean knife or floral shears, trim 1 to 2 inches off each stem at a 45-degree angle so the stems can drink more efficiently.
Next, condition the stems in a clean bucket of cool water for at least 1 to 2 hours before arranging, especially if the flowers have been out of water for a while. In our experience, lilies benefit from a quiet rest period that lets them rehydrate evenly.
If any stamens are already shedding pollen, gently remove them now to prevent staining the petals and to keep the arrangement looking fresh and polished.
Water quality matters more than most people expect. We suggest using a thoroughly washed vase filled with fresh water and flower food, then recutting the stems right before placement. Keep the cut ends out of direct sunlight and away from ripening fruit while they condition.
That small bit of care helps the lilies open more evenly and gives us a sturdier foundation for the finished arrangement.
Building a Balanced Lily Arrangement Without Crowding the Vase
For a balanced look, begin with the tallest stems first and place them slightly off-center rather than straight up in the middle. That simple shift creates movement and keeps the arrangement from feeling stiff.
We usually build around 3 to 5 focal stems in a medium vase, then add supporting stems around them at different heights so the lilies have room to open naturally.
Spacing is everything with lilies because their blooms get larger over time. Leave enough breathing room between stems so the flower heads don’t press against one another or against the vase rim. We suggest turning the vase as you work and checking the silhouette from several angles.
If one side looks dense, thin it out before adding more greenery or filler, since overcrowding can hide the shape of the flowers.
To create a more professional finish, think in layers: one layer for height, one for the main blooms, and a lighter layer near the base to soften the design. A few curved stems can add elegance, but too many can make the arrangement feel heavy.
In our experience, lilies look best when the vase itself remains visible and the blooms appear to float rather than sit packed together.
Keeping Lilies Fresh Longer After You Arrange Them
Once the arrangement is set, place it in a cool spot away from direct sun, heating vents, and drafty windows. Lilies last noticeably longer when they are not exposed to sudden temperature swings. We recommend changing the water every 2 days, washing the vase each time, and trimming about 1/2 inch from the stems to reopen the water pathways.
Fresh water makes a bigger difference than most quick fixes.
As the blooms open, remove spent petals and any pollen-heavy anthers to reduce mess and slow decline. If a stem starts to weaken, take it out before it affects the rest of the bouquet. We found that lilies stay more attractive when the arrangement is lightly maintained every day or two rather than left untouched.
That small routine keeps the vase looking intentional instead of tired.
It also helps to keep the arrangement away from fruit bowls, since ethylene gas from ripening produce can shorten vase life. If possible, move the lilies to a cooler room overnight, especially in warm weather. We suggest using flower food with each water change and topping off the vase as needed so the stems never sit dry.
With consistent care, lilies can stay beautiful for 7 to 14 days or sometimes longer.
Fixing Droopy Lilies, Pollen Mess, and Other Common Problems
Droopy lily stems usually mean the flowers need a better support system and a fresh drink of water. We recommend recutting each stem at a 45-degree angle under running water, then placing them in a clean vase filled with room-temperature water.
If the blooms are heavy, choose a vase with a narrower neck or add a few decorative stems like eucalyptus to help hold them upright. Support matters as much as the flowers themselves.
Pollen can create a real mess, especially once the anthers open fully. In our experience, the easiest fix is to remove the pollen-covered anthers as soon as the lily opens, using clean fingertips or small scissors. Do this carefully so the pollen does not brush onto petals, fabric, or tabletops.
If pollen does get on clothing or a tablecloth, we suggest lifting it away with tape rather than rubbing it, which can spread the stain further.
Other common issues are cloudy water, bent stems, and petals that open too fast in warm rooms. We suggest changing the vase water every 2 days and trimming the stems slightly each time to keep them absorbing properly. Keep the arrangement away from direct sun, heaters, and ripening fruit, which can shorten bloom life.
If a stem sags badly, wrap it loosely in paper for an hour or two to help it straighten before returning it to the vase.
Frequently Asked Questions
How do we keep lilies fresh longer in a vase?
We recommend trimming the stems at a 45-degree angle, removing any leaves that would sit below the waterline, and placing the lilies in a clean vase with fresh lukewarm water. Adding flower food helps, too. In our experience, changing the water every two days and keeping the vase away from direct sunlight, heat, and ripe fruit can noticeably extend freshness.
Should we remove the pollen from lilies before putting them in a vase?
Yes, we usually remove the anthers, which are the pollen-covered tips inside the bloom. This helps prevent pollen stains on petals, furniture, and clothing, and it can also reduce the mess as the flowers open. Use a tissue or small scissors to gently remove them before arranging. Do this carefully, since the petals can bruise easily if handled too roughly.
How many lily stems should we put in one vase?
The right number depends on the vase size, but we find that 3 to 5 stems work well for a medium vase. Larger arrangements may need more, while smaller vases look best with just one or two stems. The key is giving each bloom enough space to open naturally.
Crowding lilies too tightly can trap moisture and make the arrangement look heavy.
What water level is best for lilies in a vase?
We recommend filling the vase about halfway to two-thirds full, depending on stem length and vase height. Lilies drink a fair amount of water, so the level should stay high enough to keep the stems hydrated without submerging any leaves. Clean water matters more than a full vase.
Refreshing the water regularly helps prevent bacteria and keeps the blooms looking crisp longer.
How do we arrange lilies in a vase so they look balanced?
Start by choosing a vase that supports the stems without crowding them. We usually place the tallest stem in the center or slightly off-center, then angle the others outward for a natural shape. Rotate the vase as you place each stem to check symmetry from all sides.
Allow some blooms to face different directions so the arrangement feels full, airy, and visually balanced.
Final Thoughts
Arranging lilies in a vase is simple when we focus on the basics: clean stems, fresh water, the right vase, and enough space for the blooms to open. We’ve found that lilies look their best when they are not overpacked and when the pollen is managed early.
A thoughtful setup not only improves appearance, but also helps the flowers last longer and stay healthier.
If the arrangement feels uneven at first, we can always adjust the stem angles, remove a bloom, or switch vases for a better fit. Start with a few stems and build from there, and let the flowers guide the design. With a little care, we can create a lily arrangement that feels fresh, elegant, and easy to enjoy every day.