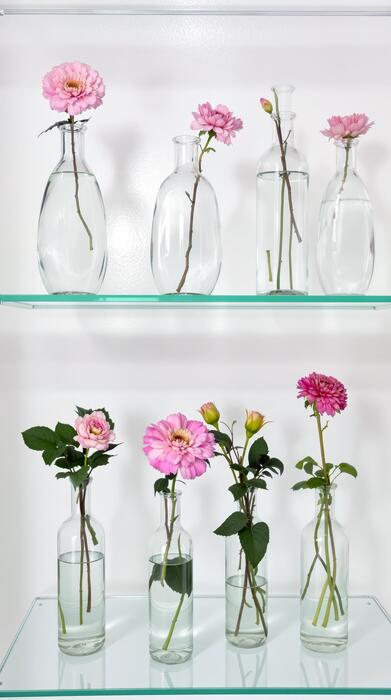
How to Arrange Roses in a Short Vase: 2026 Top Picks
If we want how to arrange roses in a short vase to look polished, we start by cutting the stems short, removing leaves below the waterline, and placing the roses in a loose, low cluster. The trick is to let the blooms sit just above the rim so the vase feels intentional, not crowded.
We found that short vases work best when we keep the arrangement compact and slightly domed. In our experience, the roses need room to breathe, so we recommend spacing the heads at different heights instead of lining them up evenly. That small variation creates a fuller, more natural look.
One detail most guides miss: the vase opening matters as much as the roses. A short vase with a narrower mouth gives us instant structure, while a wide opening can make stems slip outward and lose shape. We also like to angle a few stems inward so the arrangement holds itself together without looking forced.
The biggest mistake with how to arrange roses in a short vase is using stems that are too long and trying to bend them into place. That usually leads to drooping blooms, messy spacing, and water that gets crowded with leaves. Shorter cuts and cleaner stems always give us better control and a fresher finish.
With those basics in mind, we can build a rose arrangement that feels balanced, low, and elegant. Below, we’ll walk through the simple steps, the stem prep that saves time, and the styling choices that help a short vase look full without overwhelming the flowers.
In This Guide
- How to arrange roses in a short vase without crowding the stems
- Pick the right rose blooms, vase shape, and stem length
- Trim, strip, and measure your roses before you start
- A quick rose arrangement comparison
- How to build a low, balanced rose shape that looks full
- Fixing droopy stems, gaps, and awkward angles as you go
- Finishing touches that make a short-vase rose arrangement look polished
How to arrange roses in a short vase without crowding the stems
Start by treating the vase like a small stage, not a holding container. In a short vase, roses look best when the stems have room to breathe, so we recommend creating a loose spiral rather than packing every stem straight down into the opening.
Keep the outer blooms slightly higher and angle the interior stems outward so the bouquet opens up naturally. That small change prevents the “bunched up” look immediately.
In our experience, the easiest way to avoid crowding is to work in layers. Place the first rose near the center, then add the next blooms around it at different angles, rotating the vase as you go. If the neck is narrow, use fewer stems than you think you need—often 5 to 9 roses is enough for a short vase.
Removing lower leaves and excess side growth also helps the arrangement feel airy, clean, and intentional.
Waterline matters too. Because the vase is short, the stems sit close together, so we suggest trimming only as much as needed and keeping the submerged portion clear of foliage. If the bouquet still looks dense, step back and separate the blooms visually by varying height by 1 to 2 inches.
Those tiny height differences create movement, give each rose its own space, and keep the design elegant instead of cramped.
Pick the right rose blooms, vase shape, and stem length
Not every rose works well in a short vase, so bloom choice makes a big difference. We recommend roses with medium to large heads and sturdy petals, since very small blooms can disappear in a low container while overly heavy garden roses may droop if the stems are too short.
Look for stems with a healthy, straight section below the bloom and a natural bend only near the top, where the flower can gently rest.
Vase shape is just as important as the flowers themselves. A short vase with a slightly tapered neck gives the stems gentle support, while a wide-open mouth can make the arrangement spread too far and look unfinished. In our experience, the best proportions come from a vase that is about one-third the height of the finished arrangement.
That balance helps the roses feel full without overwhelming the container.
Stem length should match the vase rather than the other way around. For a short vase, we suggest leaving stems long enough to sit about 1.5 to 2 times the vase height above the rim, then trimming as needed after you test the shape.
If the roses are too tall, the design can topple or look top-heavy; if they are too short, the blooms can sit awkwardly low and disappear into the mouth of the vase.
Trim, strip, and measure your roses before you start
Preparation is where a polished arrangement really begins. Before placing any rose in water, we recommend measuring the vase height and comparing it to the stems so you know how much to cut. A good rule is to trim the stems so the flowers rise 4 to 6 inches above the rim for a compact short-vase arrangement.
That gives enough presence without making the bouquet feel oversized or unstable.
Next, strip away any leaves or thorns that would sit below the waterline. This step is easy to rush, but it matters because submerged foliage breaks down quickly and clouds the water. We usually remove at least the lower two-thirds of leaves on short stems.
Also, re-cut each stem at a 45-degree angle with sharp floral shears so the roses can drink more efficiently once they are placed in the vase.
As you prep, group the roses by length and bloom size before arranging them. That makes it easier to place taller stems in the center or back and shorter ones around the edges, depending on the look you want. We suggest keeping a bowl of clean water nearby so cut stems stay hydrated while you work.
A few minutes of careful prep saves a lot of reshaping later.
A quick rose arrangement comparison
| Arrangement style | Best vase shape | Look and feel | Best use |
|---|---|---|---|
| Compact dome | Short, wide vase | Dense, rounded, and polished | Dining table centerpieces |
| Loose garden style | Low bowl or squat vase | Airy, natural, slightly undone | Casual entertaining |
| One-sided design | Short vase with a stable base | Full from the front, lighter from the back | Entry tables and mantels |
| Minimal trio | Very small short vase | Clean, modern, and restrained | Bedside tables or small spaces |
When we arrange roses in a short vase, the first decision is not the flowers themselves but the shape you want the eye to see. A compact dome feels formal and full, while a looser garden style gives more movement and air.
In our experience, the vase should support the look: the lower and wider the vessel, the easier it is to keep rose heads balanced without fighting gravity.
Short vases are forgiving, but they also make every stem angle visible, so the style choice matters more than people expect. A low dome hides mechanics well and works beautifully for dinner tables, while a minimal trio can look elegant in a small powder room or on a desk.
We recommend choosing a style before cutting stems, because the final height and spread depend on that decision.
If you are unsure where to begin, the easiest route is usually a compact, rounded arrangement with one clear focal point and a few supporting blooms. That approach gives fullness without looking crowded.
We find it especially helpful in short vases because the finished design reads as intentional even when the roses are not perfectly matched in size, opening stage, or stem length.
How to build a low, balanced rose shape that looks full
To build a low shape, start with a simple rule: the finished flower heads should sit about 1 to 1.5 times the vase’s height above the rim, not towering over it. We suggest removing any leaves that would sit below the waterline, then cutting the first stems slightly longer than you think you need.
That gives you room to angle blooms outward and create a natural dome instead of a stiff, vertical bunch.
From there, place one rose in the center as your anchor and work outward in a circle. We like to add stems at alternating angles so the heads overlap lightly without crushing each other. The goal is visual fullness, not density for its own sake.
If the vase is especially short, crossing stems in a crisscross pattern can help them lock together and stay low while still spreading the bouquet evenly.
To finish the shape, step back and check the outline from above and from the side. We recommend filling any obvious holes with smaller blooms or buds rather than forcing every rose to sit at the same height. A few heads can rise slightly above the rest, but the overall silhouette should stay broad and low.
That contrast is what makes the arrangement feel lush, not flat.
Fixing droopy stems, gaps, and awkward angles as you go
Droopy stems usually mean the rose did not get enough support or the stem was cut too long for the vase. We recommend recutting the stem at a sharper angle and shortening it in small increments, about 1/2 inch at a time, until the bloom sits where you want it.
If the flower still leans, place it closer to the vase edge or let neighboring stems brace it from both sides.
Gaps are easier to solve if we treat the arrangement like a layered puzzle. Instead of stuffing the hole with a straight stem, slide in a rose at a lower angle so the head fills space without creating a visible gap below it. Smaller buds, spray roses, or even a slightly shorter bloom can act as a bridge.
In our experience, the best fixes are often the ones that disappear once the bouquet is viewed from a few feet away.
Awkward angles often show up after the first five or six stems are in place, which is exactly when we pause and adjust. We suggest gently rotating the vase while looking for stems that point too far forward, cross too harshly, or sit too high. A quick repositioning can transform the whole design.
If needed, remove one stem rather than forcing the rest to compensate; fewer, better-placed roses usually look fuller than an overcrowded vase.
Finishing touches that make a short-vase rose arrangement look polished
Once the roses are placed, the smallest adjustments usually make the biggest difference. We suggest stepping back and checking the silhouette from the front and both sides, then trimming or turning any bloom that feels too high, too low, or out of rhythm with the rest.
In a short vase, the design should feel compact and intentional, with the top line reading as soft and balanced rather than uneven or crowded.
The water line matters more than many people realize. For a cleaner look, we recommend removing any leaves that would sit below the water and wiping the vase outside so fingerprints or drips do not distract from the flowers.
A short vase looks especially polished when the stems inside appear neat and uncluttered, so if the mechanics show through, tuck in a few extra leaves or a collar of greenery to soften the base.
Finally, pay attention to the details that make the arrangement feel finished rather than simply assembled. We like to rotate the vase until the best-facing blooms are front and center, then add one last touch such as a few sprigs of airy filler, a ribbon around the vase, or a subtle scent-free accent if the roses need a little lift.
Even 2 or 3 small tweaks can turn a basic grouping into something elegant and deliberate.
Frequently Asked Questions
How do you arrange roses in a short vase?
We recommend starting with a clean, compact vase and filling it about halfway with fresh water. Trim the rose stems at an angle so they can absorb water easily, then remove any leaves that would sit below the waterline. We usually place the tallest bloom in the center and build around it with shorter stems for a balanced, low arrangement.
How many roses should go in a short vase?
The best number depends on the vase width, but we’ve found that 3 to 7 roses works well for most short vases. A smaller vase looks fuller with an odd number, especially 3, 5, or 7 stems. If the opening is narrow, fewer roses may look more elegant and stay in place more easily. The goal is proportion, not overcrowding.
How do I keep roses from flopping over in a short vase?
We suggest trimming the stems to a similar length and cutting them shorter than you might for a tall vase. A low water level and a vase with a smaller opening can help hold the stems upright. If the roses still lean, we often cross a few stems inside the vase to create support.
Removing extra foliage also reduces weight and improves balance.
Should I cut rose stems shorter for a short vase?
Yes, we usually do. For a short vase, the stems should be cut so the blooms sit just above the rim or slightly higher. Shorter stems create a cleaner shape and keep the arrangement from looking top-heavy. We also recommend recutting the stems at a 45-degree angle under running water or with sharp shears so the roses can drink properly.
What greenery works best with roses in a short vase?
We’ve found that simple greenery works best, such as eucalyptus, ruscus, or small sprigs of ivy. These add texture without overwhelming the roses. Because short vases keep the design low and compact, we avoid large leaves or bulky filler that can crowd the blooms. A little greenery around the edges is usually enough to finish the arrangement neatly.
Final Thoughts
Arranging roses in a short vase is really about keeping the design low, balanced, and intentional. We’ve found that shorter stems, fewer leaves, and a vase with the right proportions make the biggest difference. When the blooms are grouped with care, the arrangement feels fresh and polished without looking overworked.
Small adjustments in stem length and spacing can completely change the final look.
If you’re trying this at home, start with just a few roses and adjust as you go. We recommend stepping back after each stem is added so you can see the shape from all angles. With a little practice, you’ll get a natural, elegant arrangement that suits any table or room.